
Marathon Guide: Beginner Tips to Survive Tau Ceti IV
I have now spent over 20 hours on Marathon since its launch, and based on my time plus the time spent during its Server Slam, one thing is clear: it’s a damn hard game.
If you're looking for Marathon beginner tips or a full beginner guide, the early hours on Tau Ceti IV can be brutal, especially for players new to extraction shooters. Between losing gear, managing Heat, and learning the maps, navigating it’s complex UI menu, it’s easy to feel overwhelmed.
To help new players survive a bit longer and extract more consistently, here are some essential beginner tips that can increase your chances of progressing faster in Marathon.
Last updated: April 8, 2026
Focus on the Game’s First Faction
Factions in Marathon are the lifeblood of the game’s progression, as faction upgrades literally make your Runners more efficient in each run, specifically CyberAcme, the first faction you link with.
The first thing you should do is unlock the earliest available upgrades. This faction offers upgrades such as increased Heat capacity, more vault space, faster Heat recovery, increased cash limits, and more.
Always aim to complete these upgrades as soon as they become available. Their benefits might feel small early on, but they make a huge difference later.
Maximize Sponsored Kits and Rook
Extraction shooters have a steep learning curve, and Marathon is no different. Death is part of progression, and if you feel like you don’t want to risk your better gear, start using Sponsored Kits.
These kits are free and come with a preset loadout that changes daily. They’re not the best gear available, but they’ll get the job done. More importantly, they allow you to learn map layouts without risking your own equipment or complete missions along the way.
Rook is another great option for earning gear. This Shell is specifically designed for scavenging items without risking your own vault.
There are a few catches, though. Rook runs force you to play solo, you always spawn late into a match, and you’re placed into full three-team lobbies. In short, Rook is designed to pick up the scraps other players leave behind.
If you’re lucky (or skilled), you can even wipe a full team by using enemy AI to your advantage. Rook has an ability that temporarily causes UESC bots to ignore you, effectively turning them into allies during that moment.
Don’t Buy Ammo or Meds

When you die in Marathon and lose all your gear, don’t overthink it. It’s fine, you’re going to die a lot. It’s part of the extraction shooter loop.
Where things become punishing is when players start buying ammo or medical items directly from the Armory. You start to bleed through your cash fast, and that’s not a situation you want to be in early on.
Shield rechargers cost 300, while Patch Kits (Health Packs) cost 415, which is expensive for beginners. There’s a good chance you’ll lose them minutes later while learning the game.
Even ammo can drain your funds quickly. That money is far better spent on faction upgrades.
Instead, rely on bartering. Materials can be traded for essential items at a much better value.
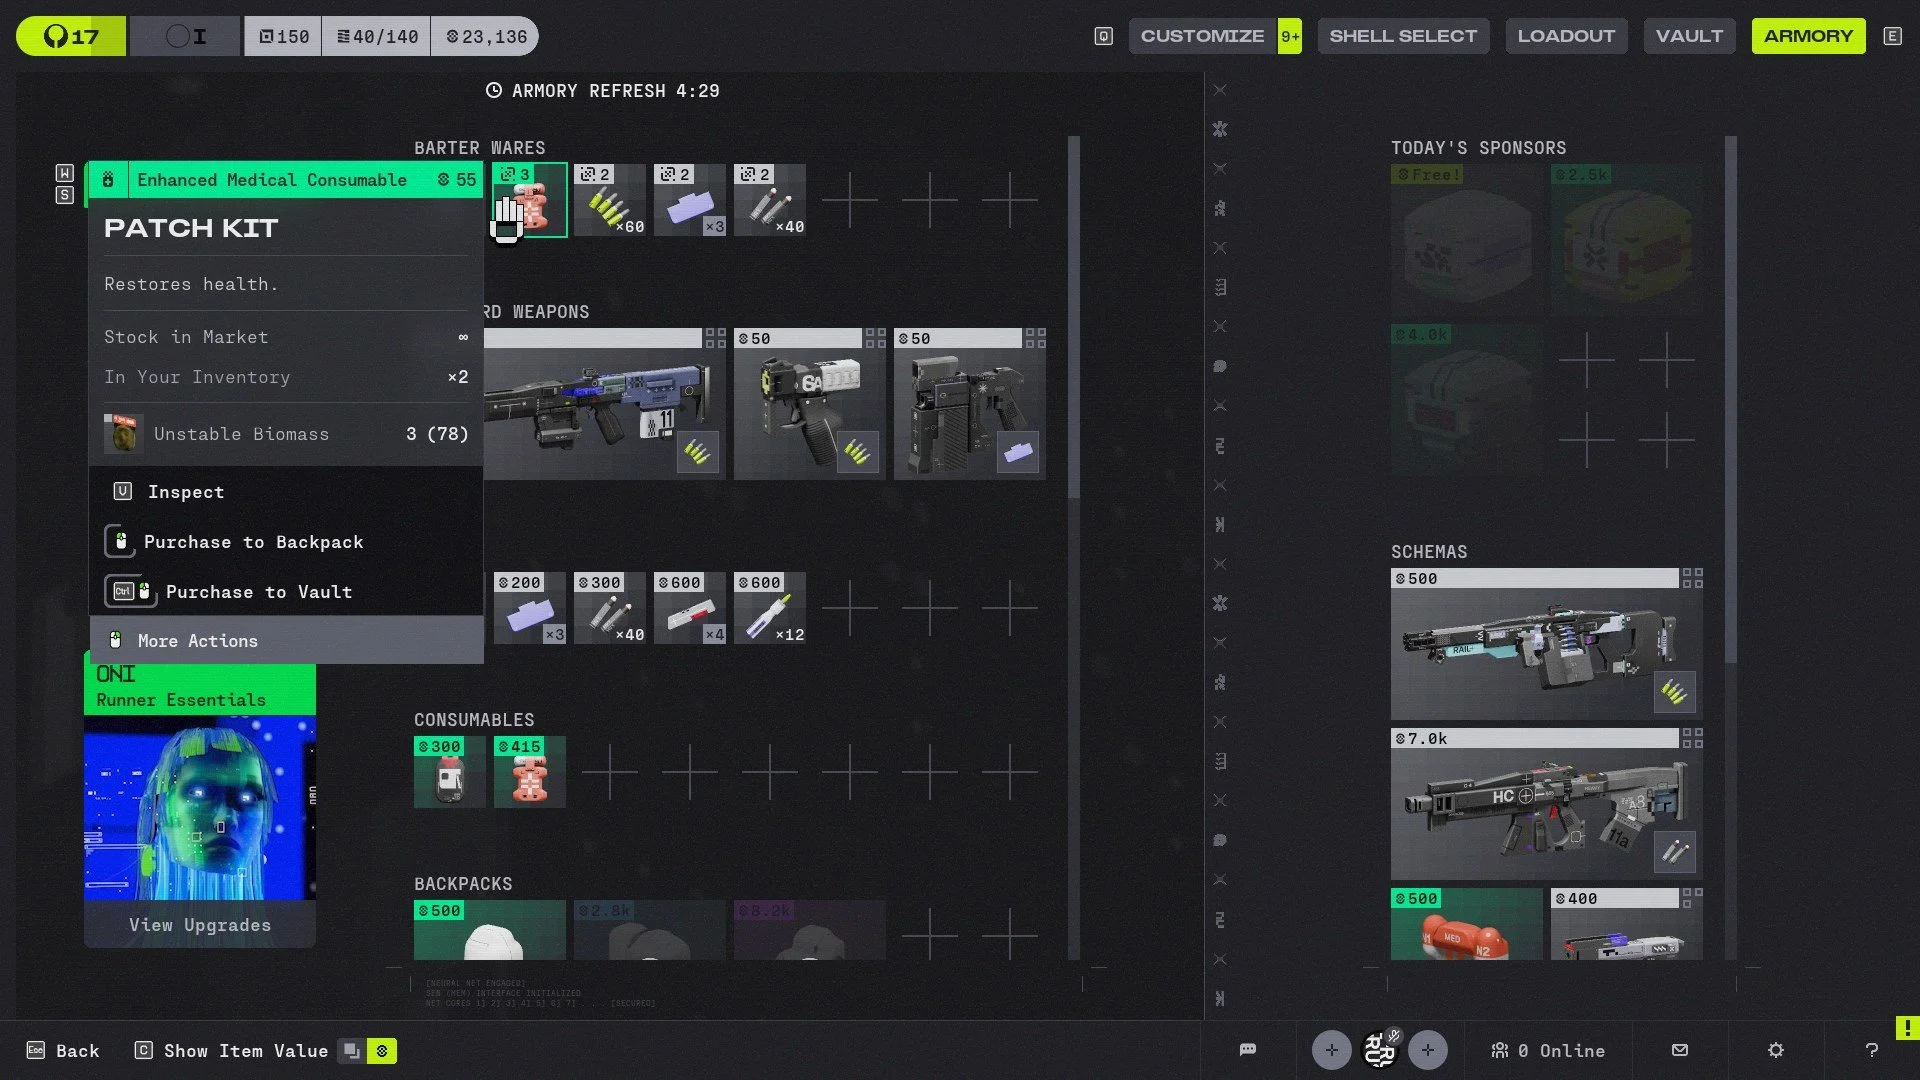
Always Save Space for Materials
This is probably the most important tip in this guide: materials are everything in Marathon.
They are not just junk to sell. Materials are required for faction upgrades and are also used in bartering for important items.
For example (These values can change in the future):
3 Unstable Diodes = green shield charge
3 Unstable Biomass = green patch kit
2 Unstable Gunmetal = 60 light rounds
2 Unstable Gel = 3 volt batteries
2 Unstable Lead = 40 heavy rounds
These materials can be found easily across all maps, and extracting with stacks of them always feels like a win. They can fuel future runs with decent consumables and ammo.
Materials can stack, and while I don’t have the exact numberson how much you can stack on one material item, I do see my vault space having over 100 Unstable Diodes (I farmed hard). I usually keep at least one to three inventory slots open specifically for them as I sometimes have runs bringing back 15 or more if I’m lucky.
Track Materials You Need
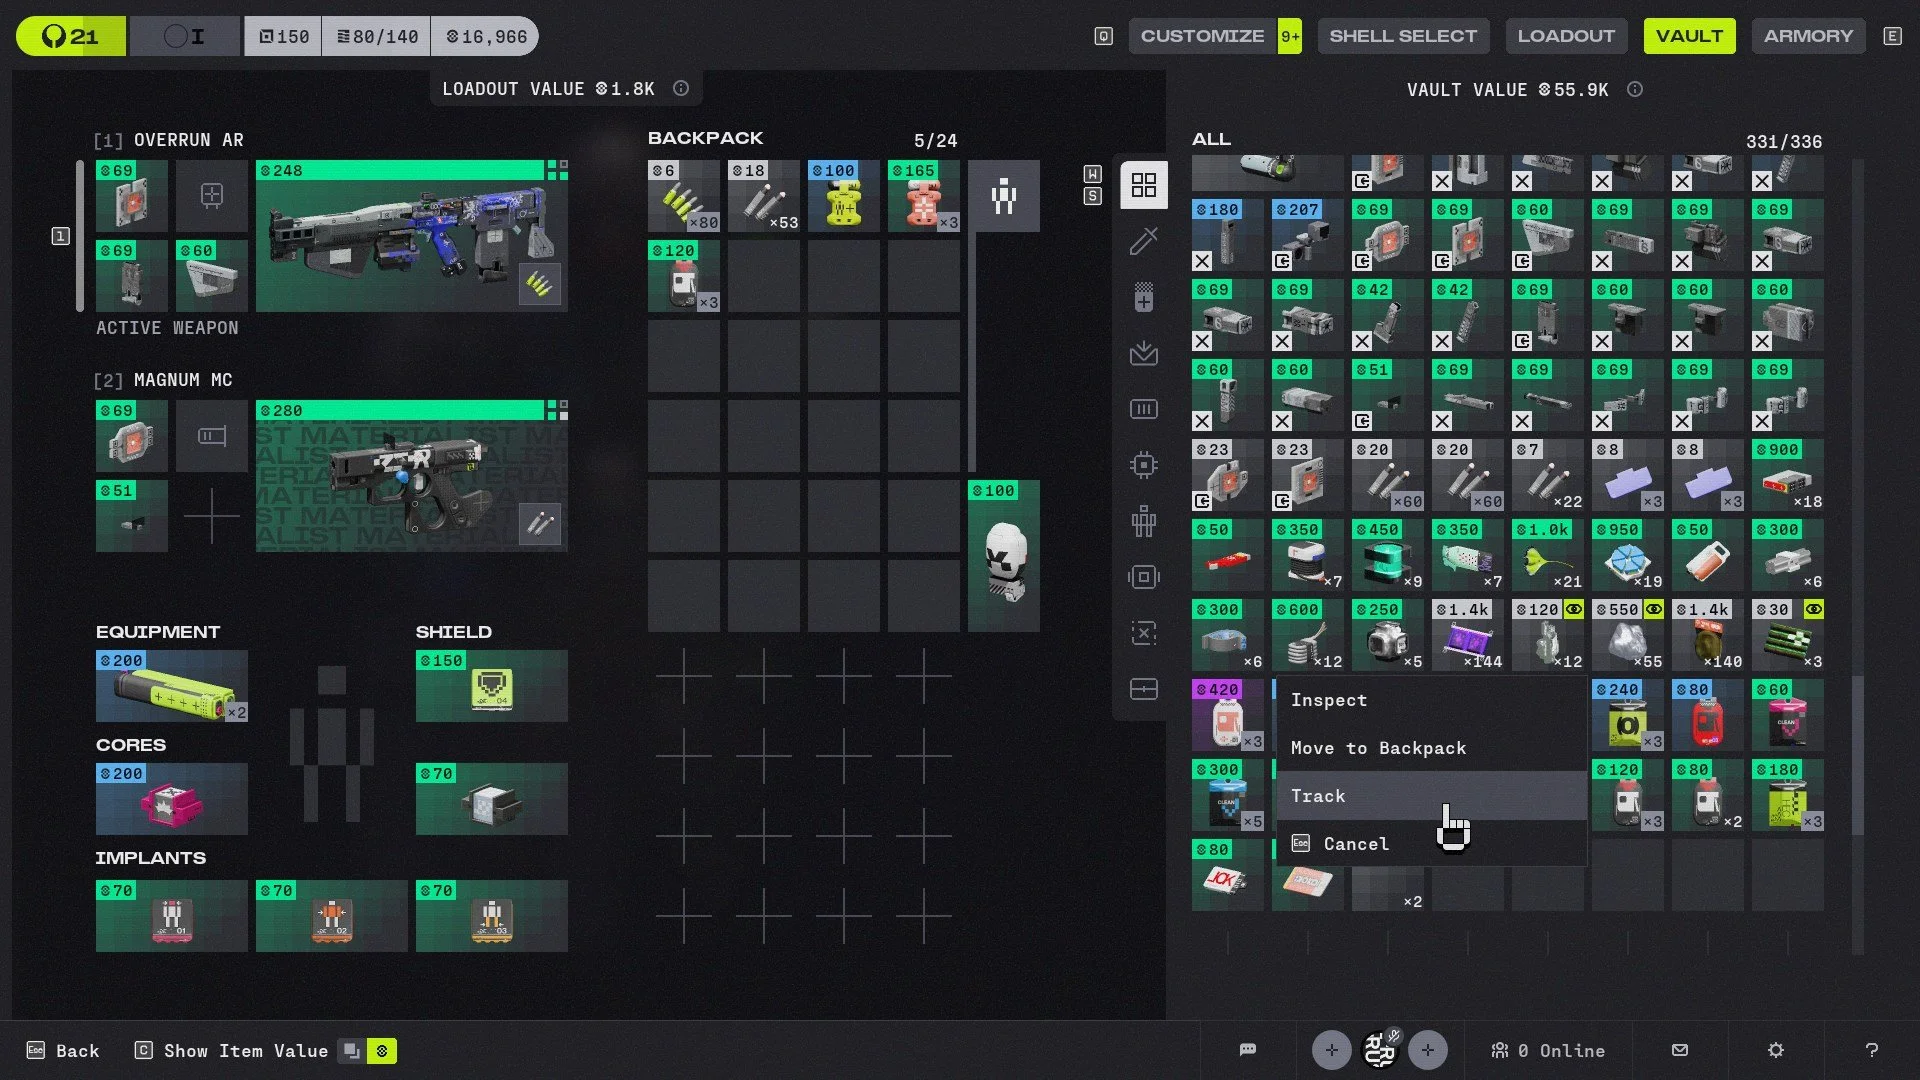
Speaking of materials, the game lets you track items you want.
If you need more Unstable Gel, simply select it and press Track. During future runs, the item will be highlighted whenever it appears.
This is useful because it’s easy to forget what you actually need while looting a player’s body. You might get distracted by a purple weapon and overlook the materials that actually matter.
The tracking system can even highlight areas where those materials are likely to spawn.
Get Familiar with Footsteps
Whether you’re playing solo or in teams, audio is critical.
Footsteps can tell you whether enemies are nearby, especially other players roaming the area. Player Runners have distinct sounds when walking, crouching, or sprinting.
At first, it can be difficult to distinguish these sounds from UESC AI enemies, but after enough hours you’ll start recognizing the difference.
Even I haven’t mastered every audio cue yet, but learning the basics like footsteps has already saved me several times.
Play Every Shell
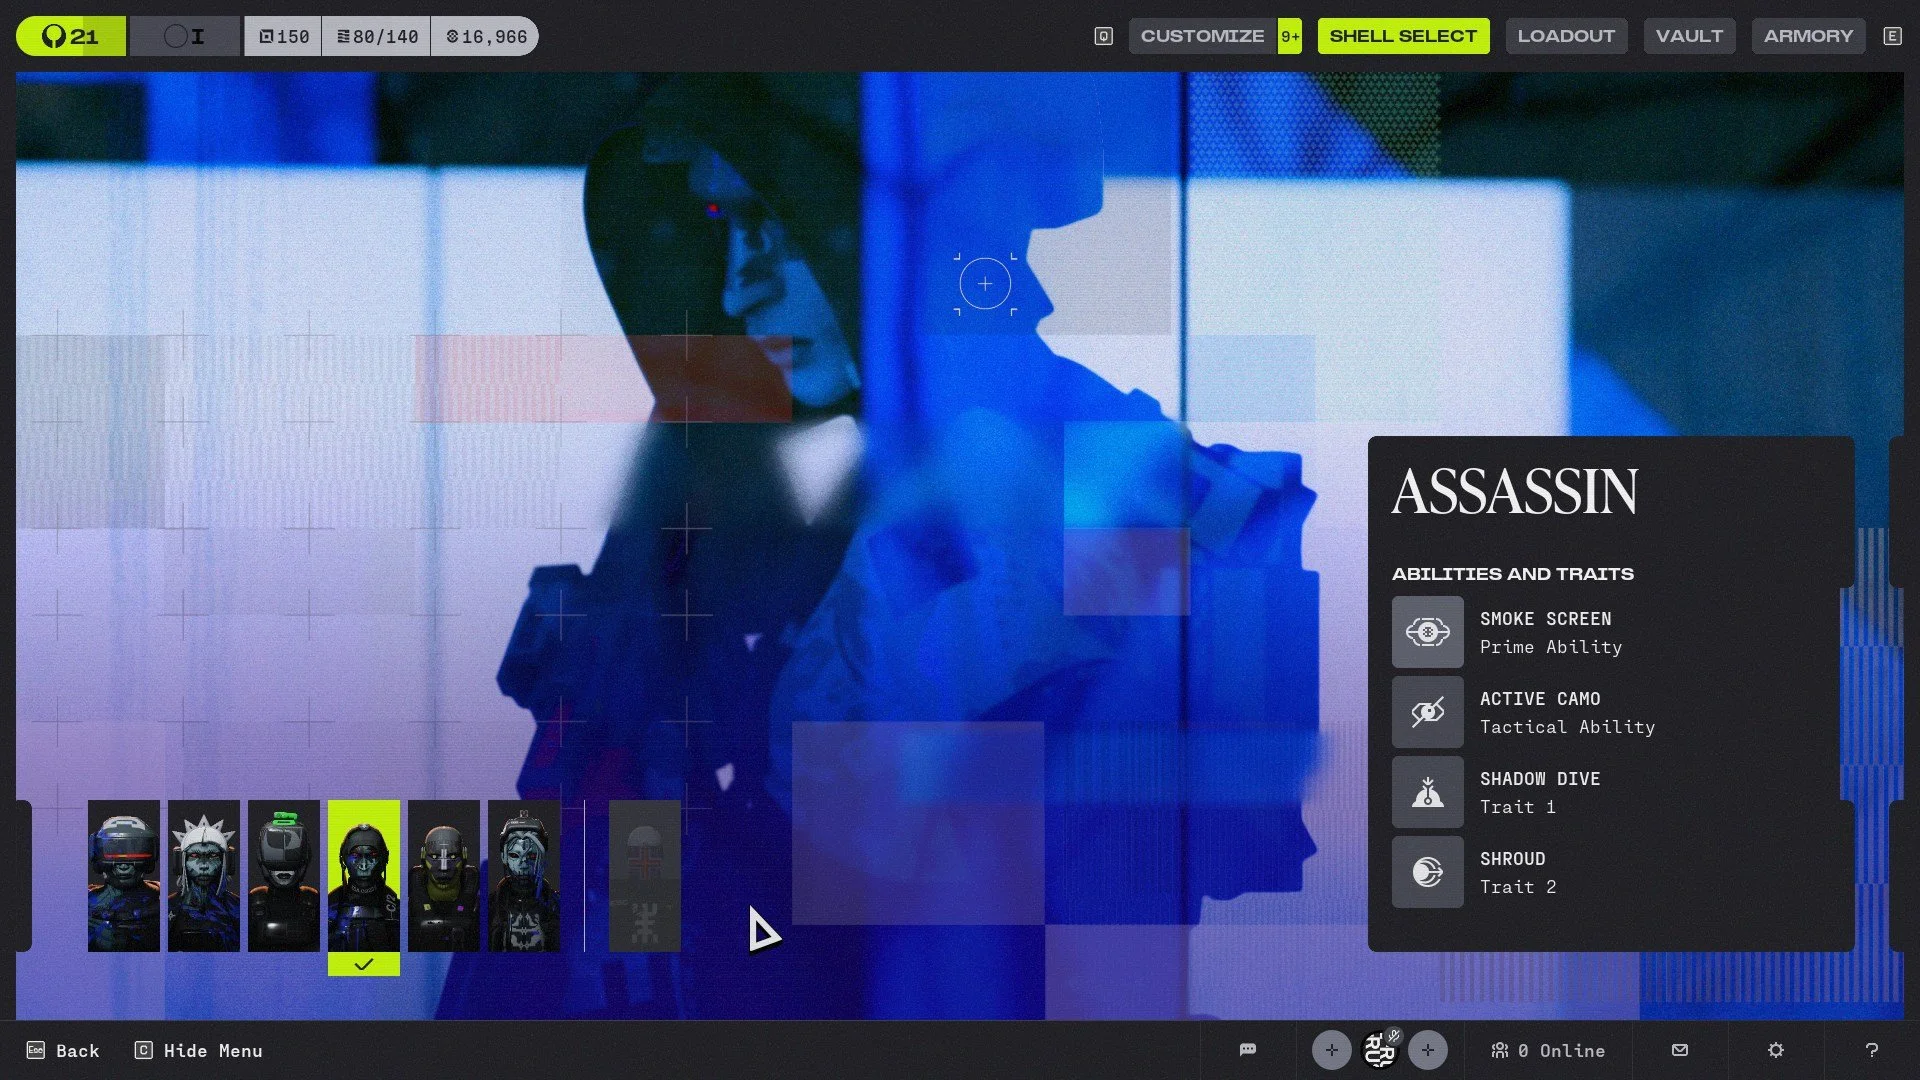
Shells act like classes in the game. Each one has unique skills and fills a specific role.
They all have strengths and weaknesses, and the best way to improve your survival chances is to understand how each one works.
Don’t stick to Recon simply because it provides enemy intel, or Assassin because cloaking allows for easy escapes. These classes I see often during solos or even in random teams.
A Destroyer can devastate enemies using Search and Destroy as your gunfire is supported by missiles firing at yor target. Triage can keep teams alive much longer with healing and revives. Thief can scout with her trusty drone and reach unique vantage points with her grappling hook, while Vandal excels at repositioning and flanking with her double jump, long and fast slide ability, and a energy blast that can act like a rocket jump.
Try them all. Learning their abilities and passives will help you understand how enemy teams operate and how to counter them.
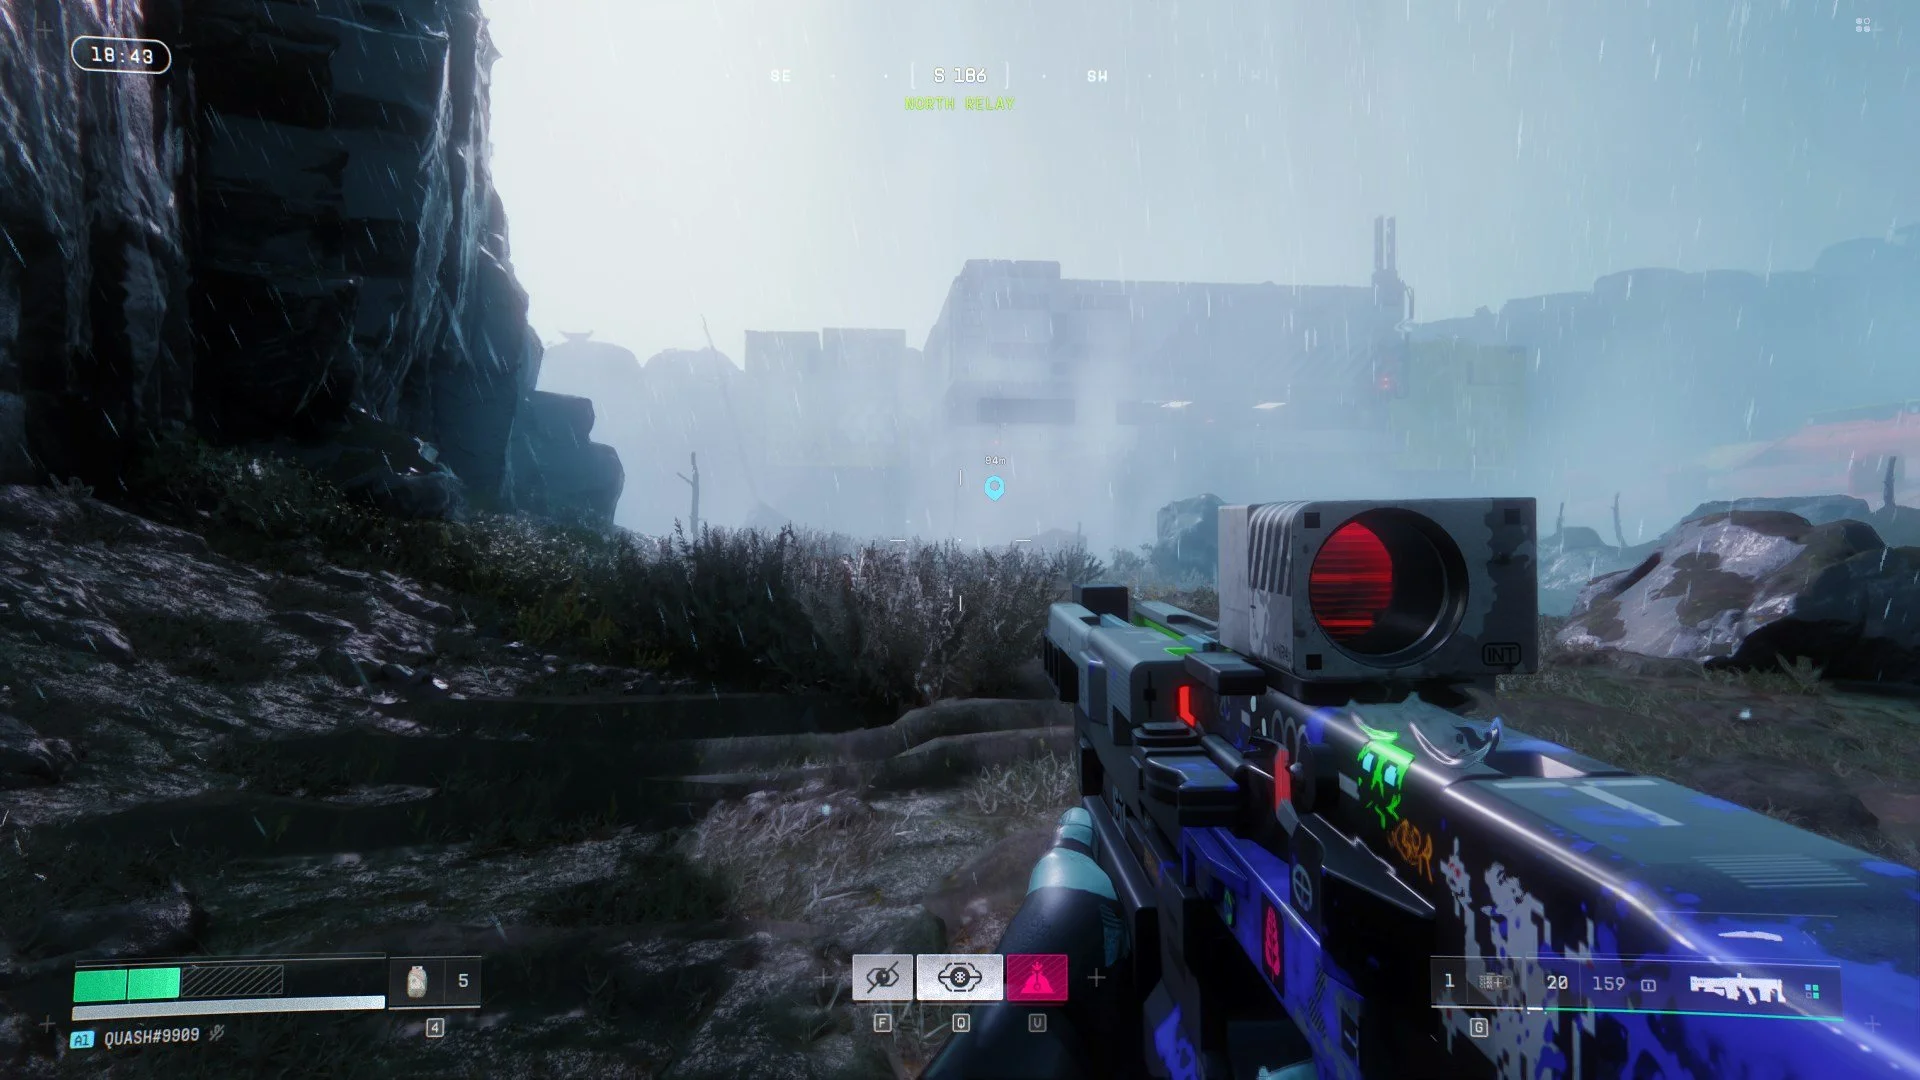
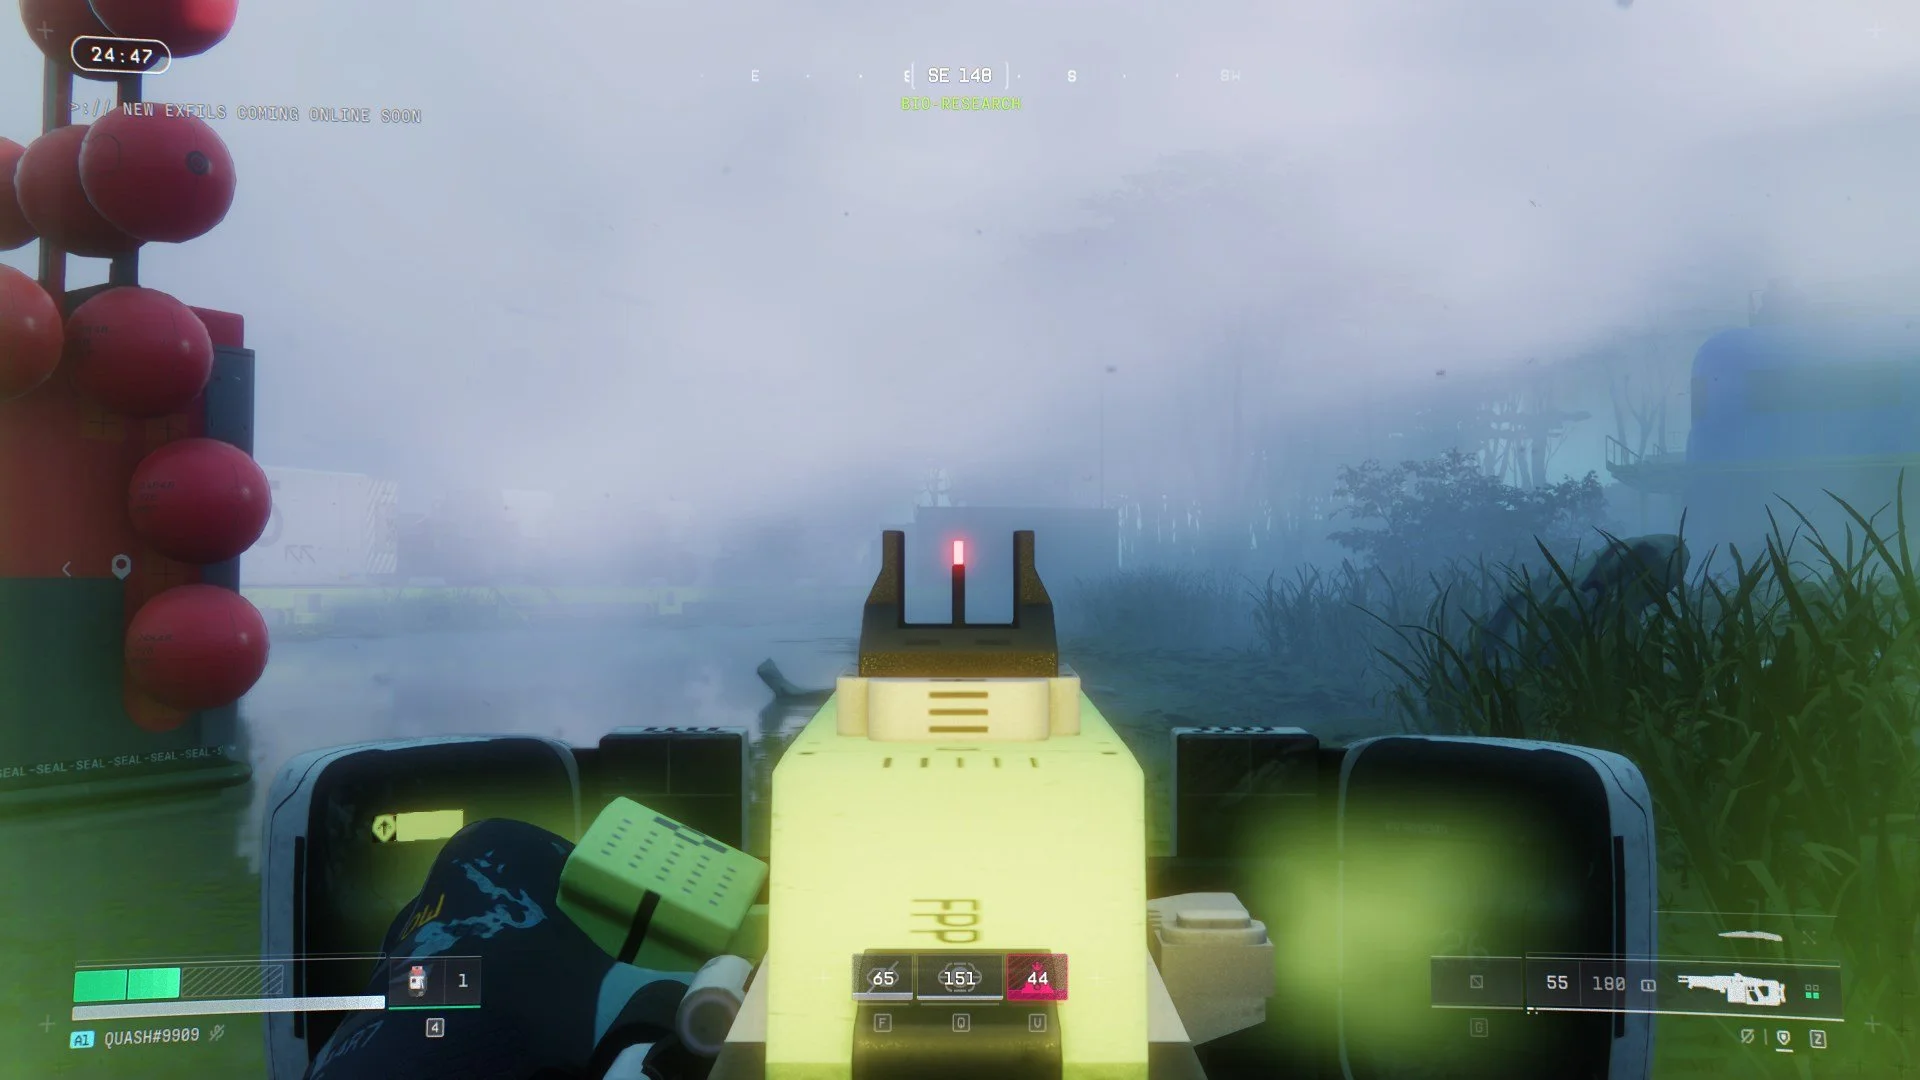
Rain and Bodies of Water Help with Overheat
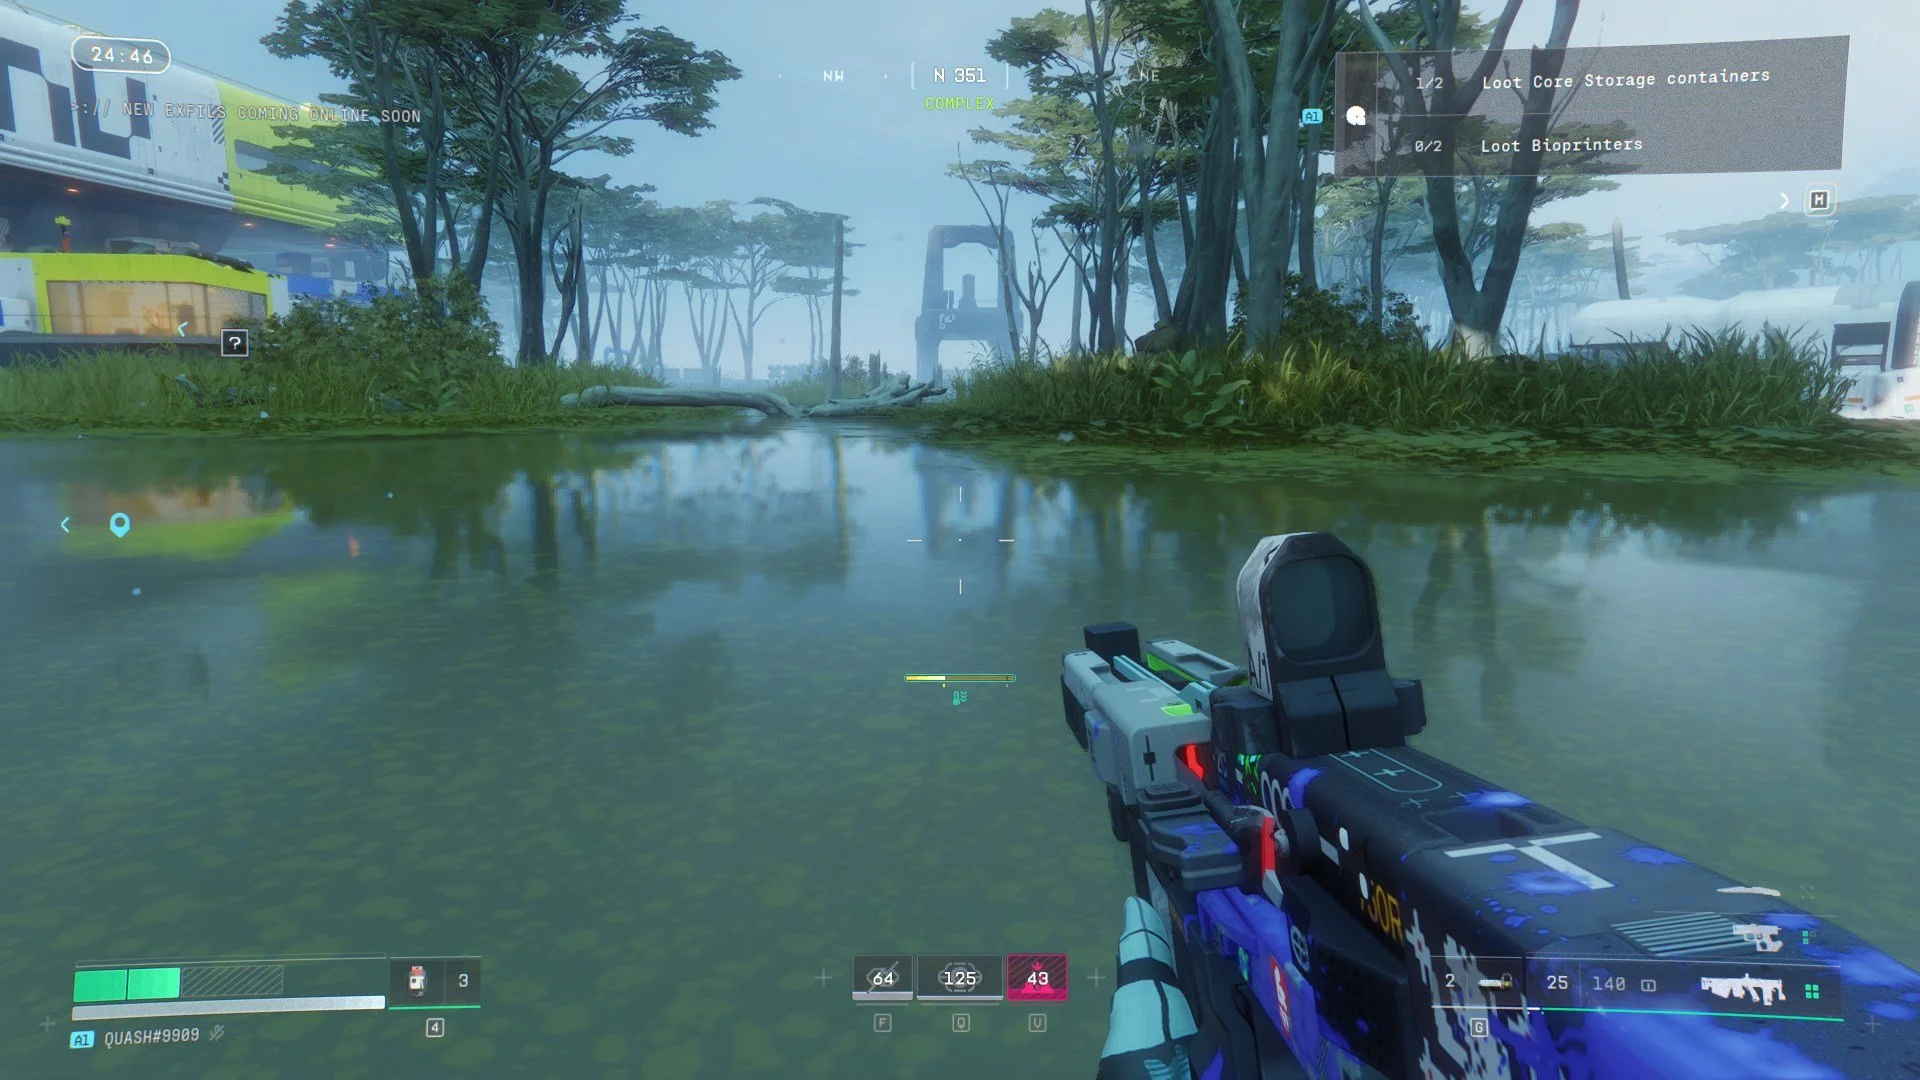
Overheat directly affects movement in Marathon. Every action you take increases your Shell’s Heat gauge. Once it fills, your Shell overheats and temporarily prevents actions like sprinting, sliding, or using certain movement abilities.
Managing Heat is essential, especially during fights.
Stopping actions and walking reduces Heat. Crouching reduces it faster. I nice addition is that rain also lowers Heat, and fortunately, Tau Ceti IV sees frequent rainfall.
Bodies of water also help cool your Shell, and certain consumables can reduce Heat or increase your Heat capacity.
You’ll notice a green icon with downward arrows below your Heat meter when rain or water is helping reduce Heat.
Keep an eye on this meter, as starting a fight while overheated (Or overheating during one) is one of the worst situations you can put yourself in.
Fully Heal After Winning a Fight
The time-to-kill in Marathon is extremely fast. Blink and you’ll be down in seconds.
When you win a fight, resist the urge to immediately loot the body. If you took damage, heal first, clear the room, then loot.
UESC enemies are deadly, and other players may still be nearby waiting to third-party the fight. Always assume someone is watching.
The last thing you want is to start another fight with broken shields.
Don’t be like Ninja.
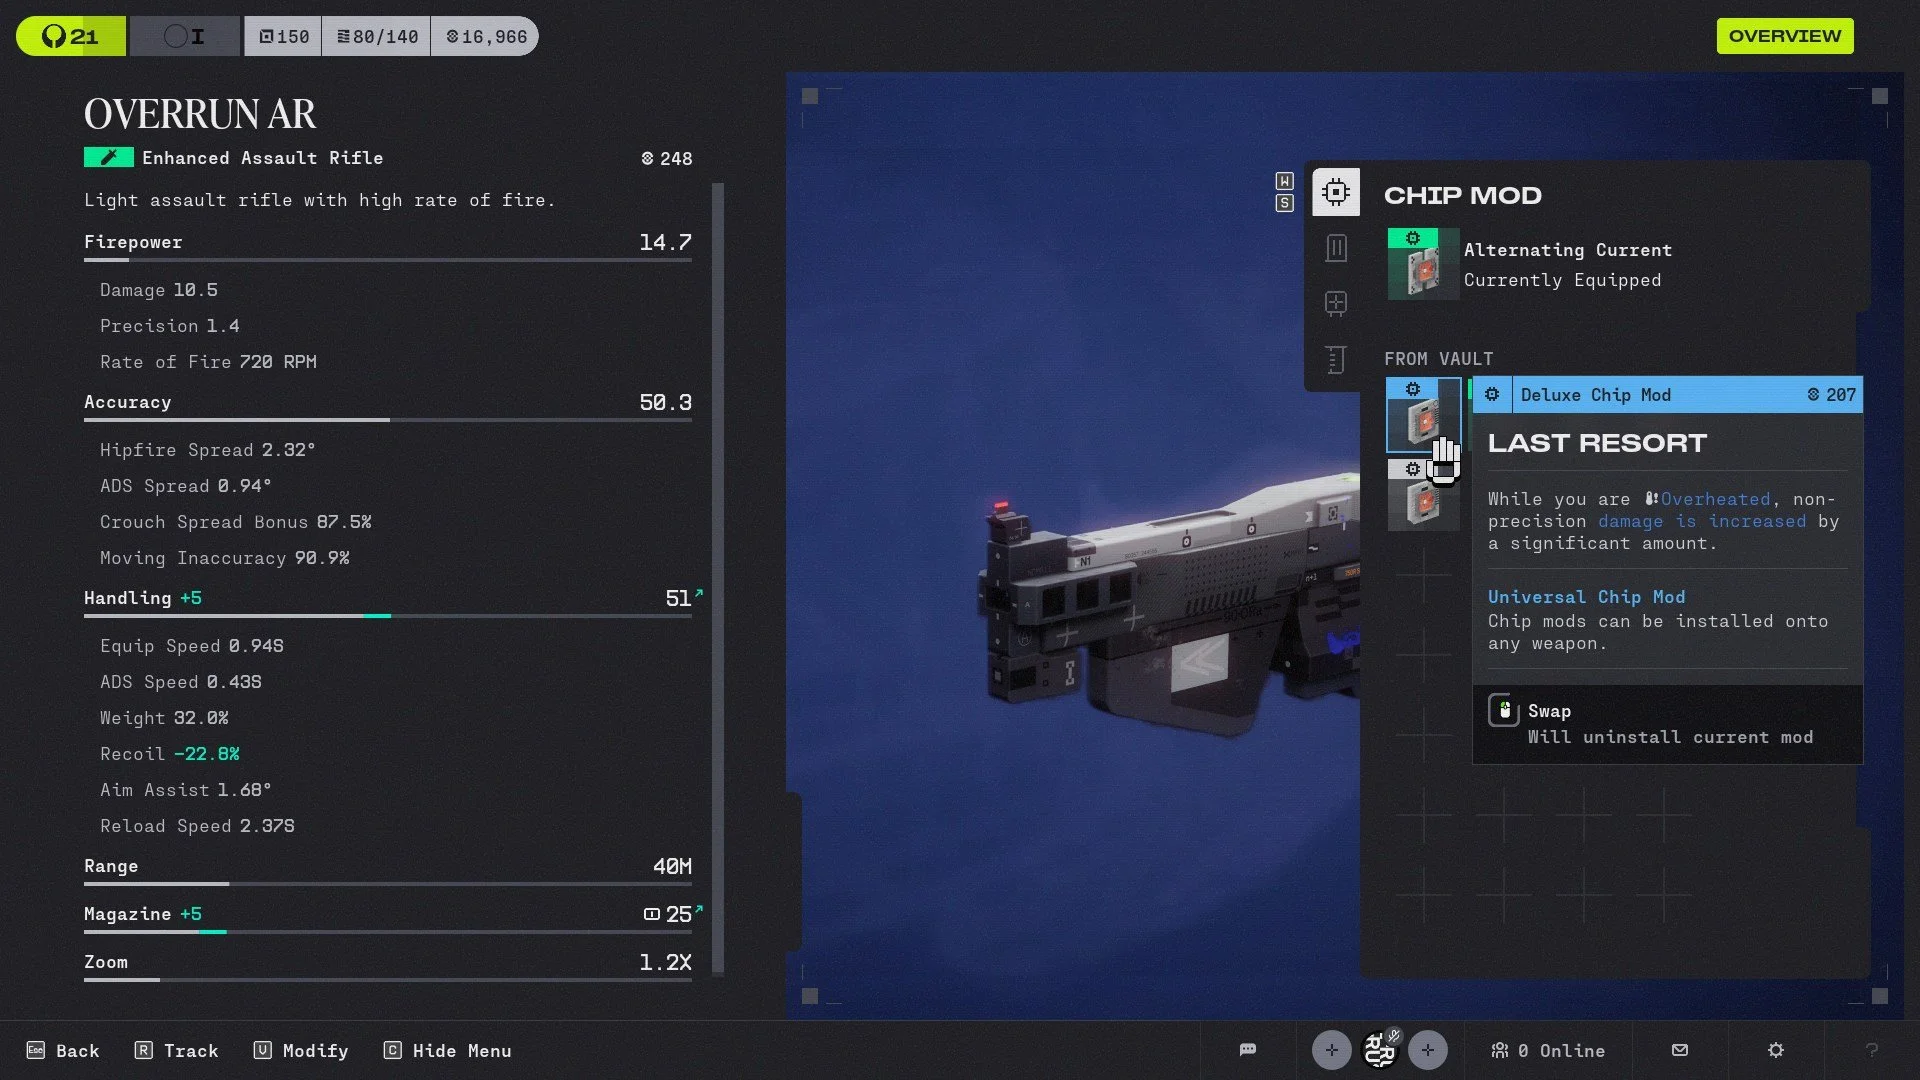
Weapon Mods Define Weapon Rarity
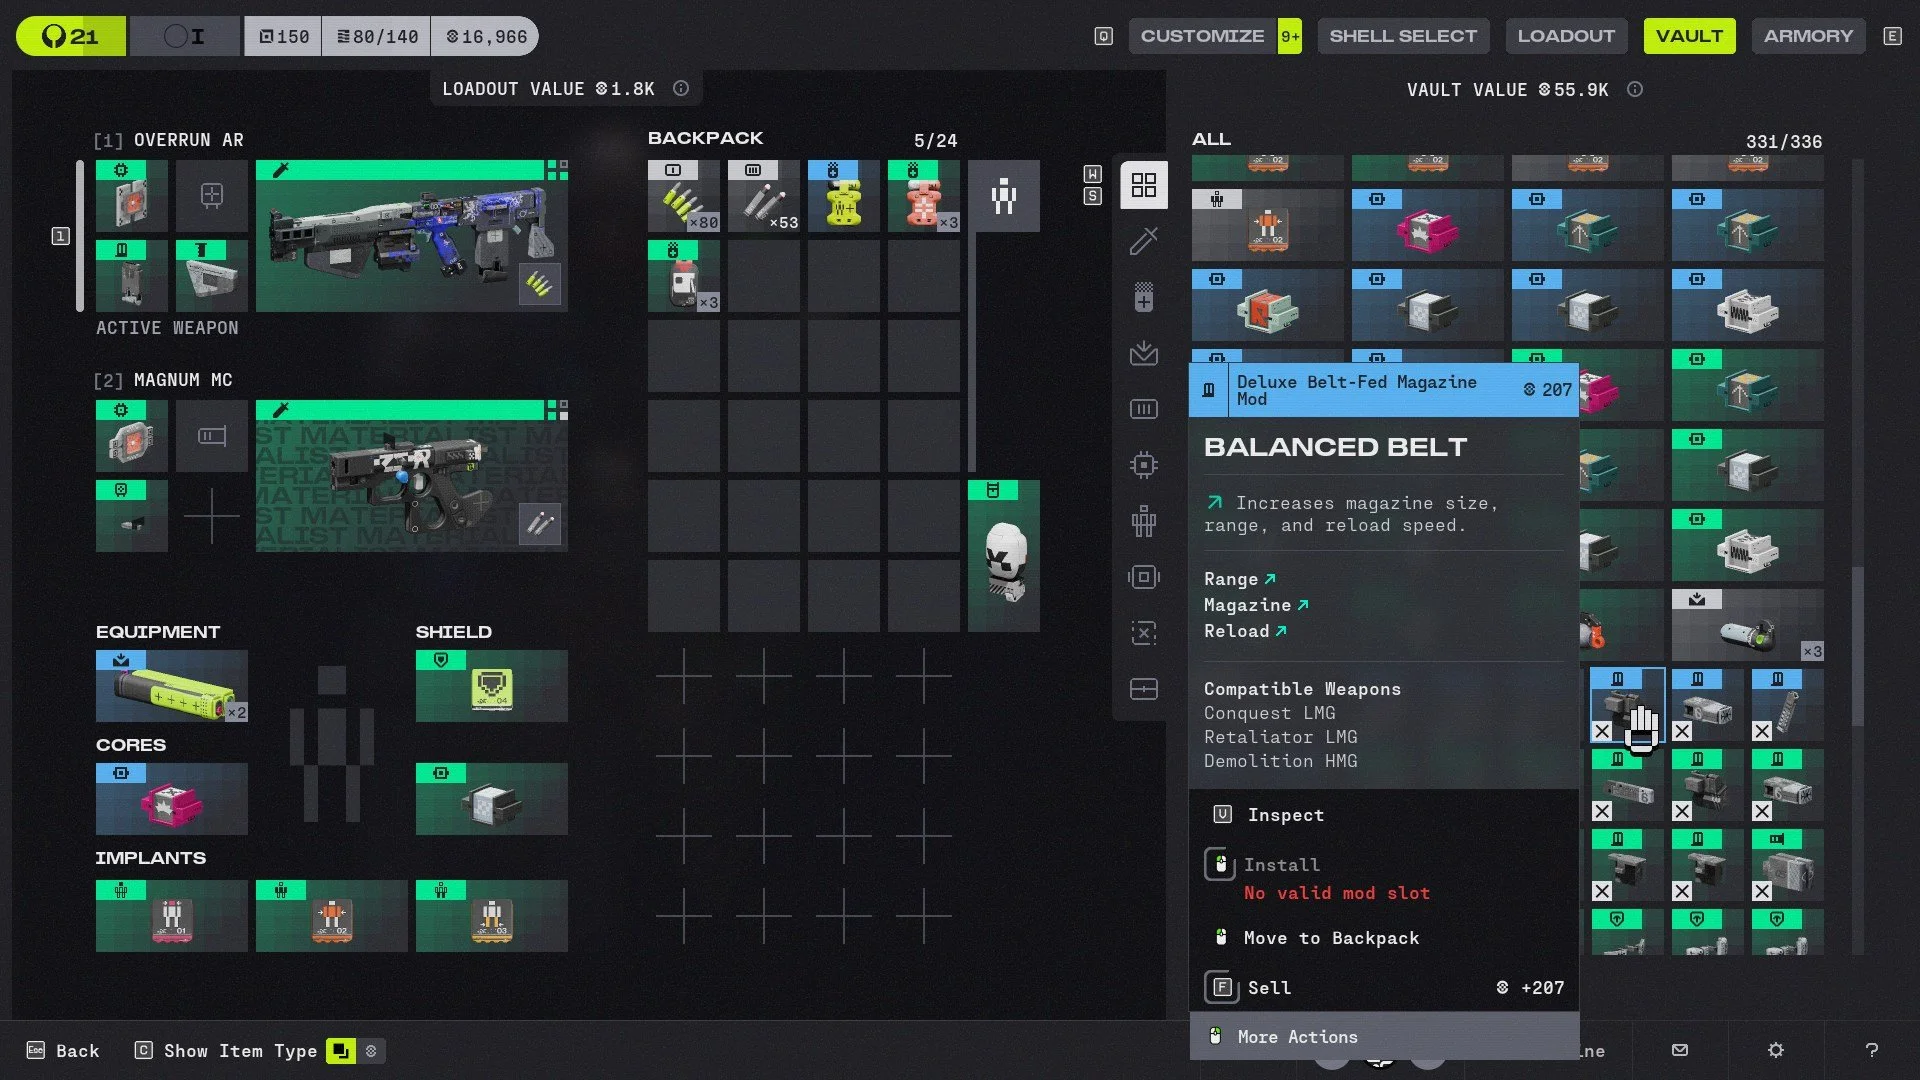
Marathon features weapon rarity, but rarity doesn’t mean the weapon deals more damage.
Instead, rarity reflects the mods attached to the weapon.
A blue sniper rifle, for example, will turn into a gray item if you remove all its mods.
Mods improve weapons in meaningful ways: larger magazines, reduced recoil, better scopes, and other enhancements.
Because of the game’s fast time-to-kill, these improvements can make a noticeable difference. If you find good mods, pick them up. They can turn a basic weapon into something far more effective for future runs.
Codex Contains Cosmetic Rewards
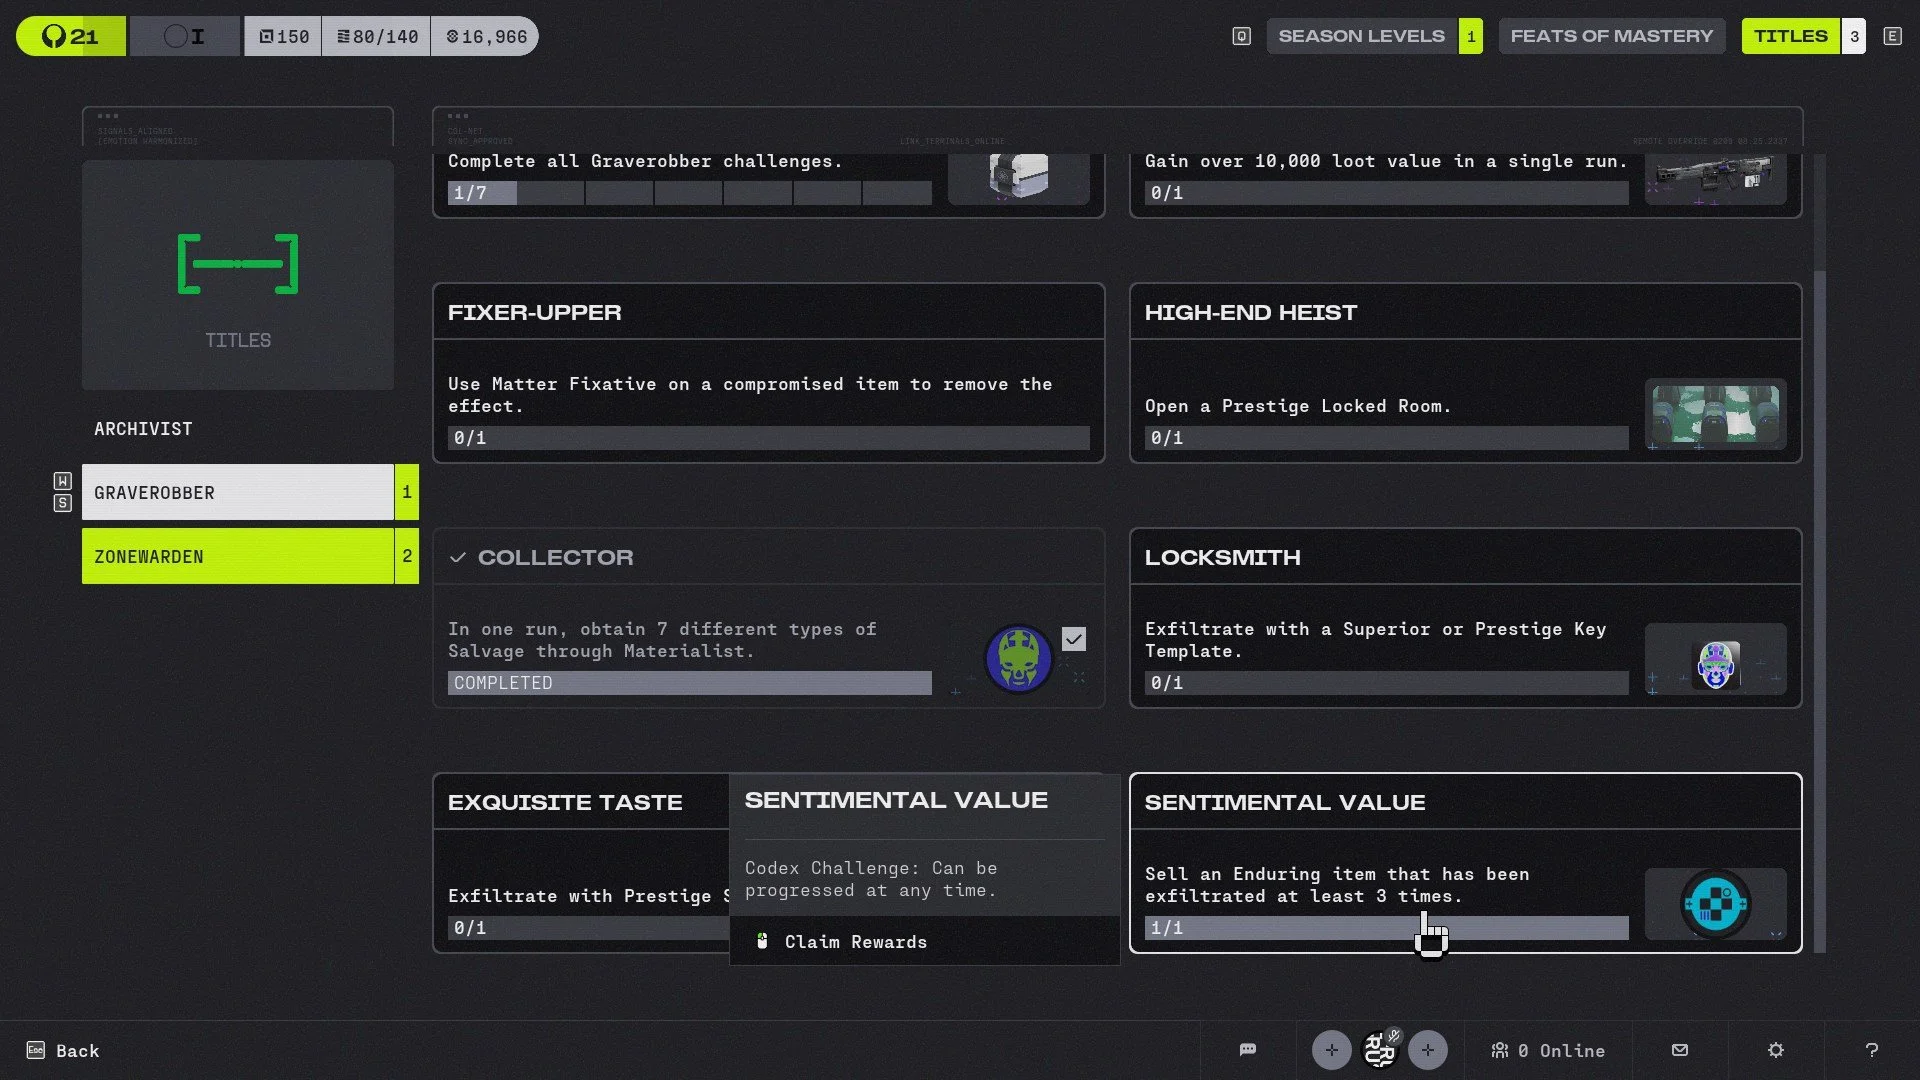
The Codex in Marathon provides additional context about the game’s world and narrative. But don’t sleep on this as It also includes challenges such as extracting with a specific Shell using a Sponsored Kit.
Completing these challenges rewards cosmetics like Shell skins, weapon stickers, and profile banners.
They’re purely cosmetic, but they’re worth checking regularly.
Always use the Ping System

Whether playing solo or in teams, always use the ping system.
Most players use it to mark enemy players or valuable loot, but it has additional uses.
Pinging an enemy will identify the specific UESC unit you’re facing. Many of them look similar from a distance, and sometimes it’s easy to mistake AI enemies for real players.
Pinging also reveals the shield type they’re using based on the shield icon color. Even players, giving you a tease of how tough it will be engaging with that player.
Keep Track of Weapon Traces
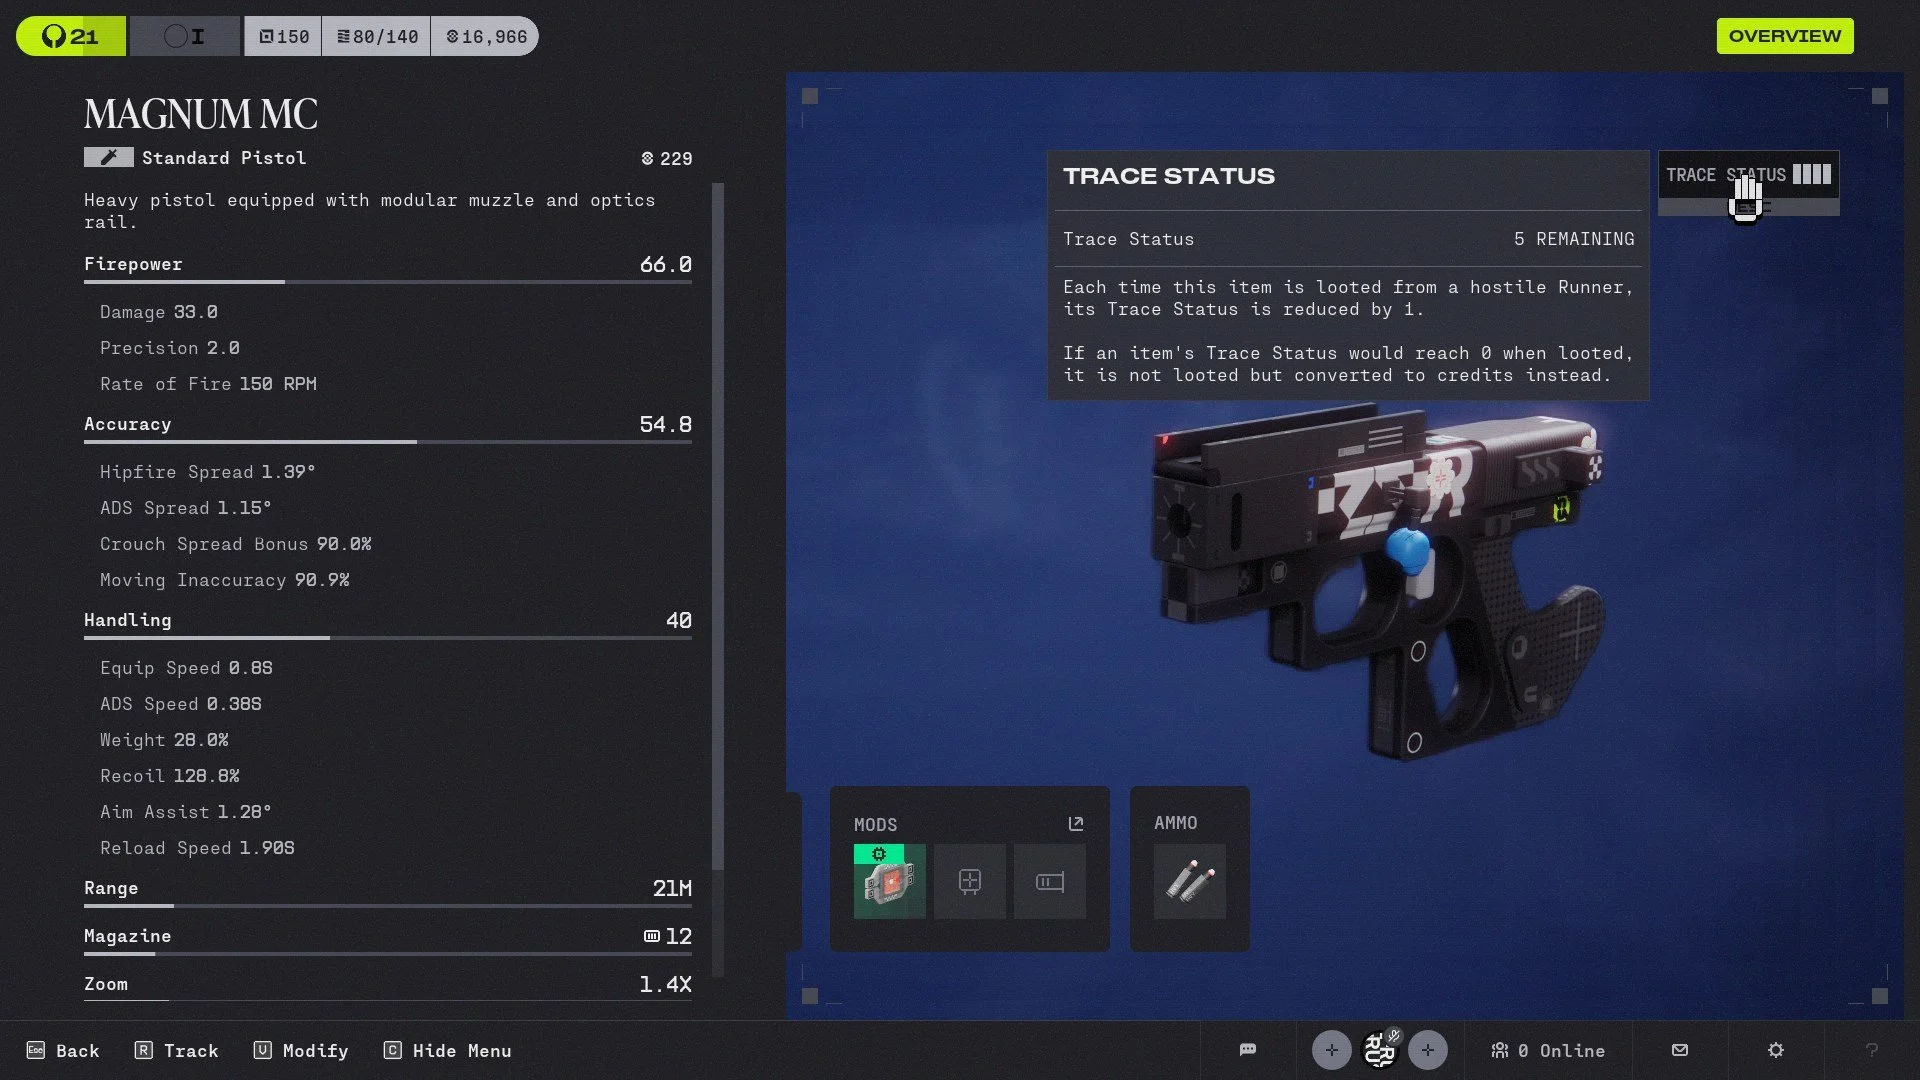
This one can be overlooked easily as every weapon in the game has Traces.
Each time the weapon is extracted from another player, its Trace value decreases. Once it reaches zero, the weapon converts into money instead of remaining as a weapon.
This system helps prevent the in-game economy from becoming flooded with weapons.
If you find a well-modded weapon, check its Trace value first. Sometimes it’s better to strip the mods and transfer them to a fresh weapon.
Manage Weapon Mods Through Inspect
Weapon mods can be difficult to manage because their icons don’t clearly show what weapons they belong to. Instead of manually checking each mod, use the Inspect feature.
Highlight a weapon and press Inspect. From there, you can view its Trace status and see every compatible mod for that weapon.
This makes managing mods significantly easier, as looking for what’s compatible by looking at your vault was a pain. I learned this only at launch, making Server Slam a bit tedious.
Weapon Schemas Are Worth Extracting
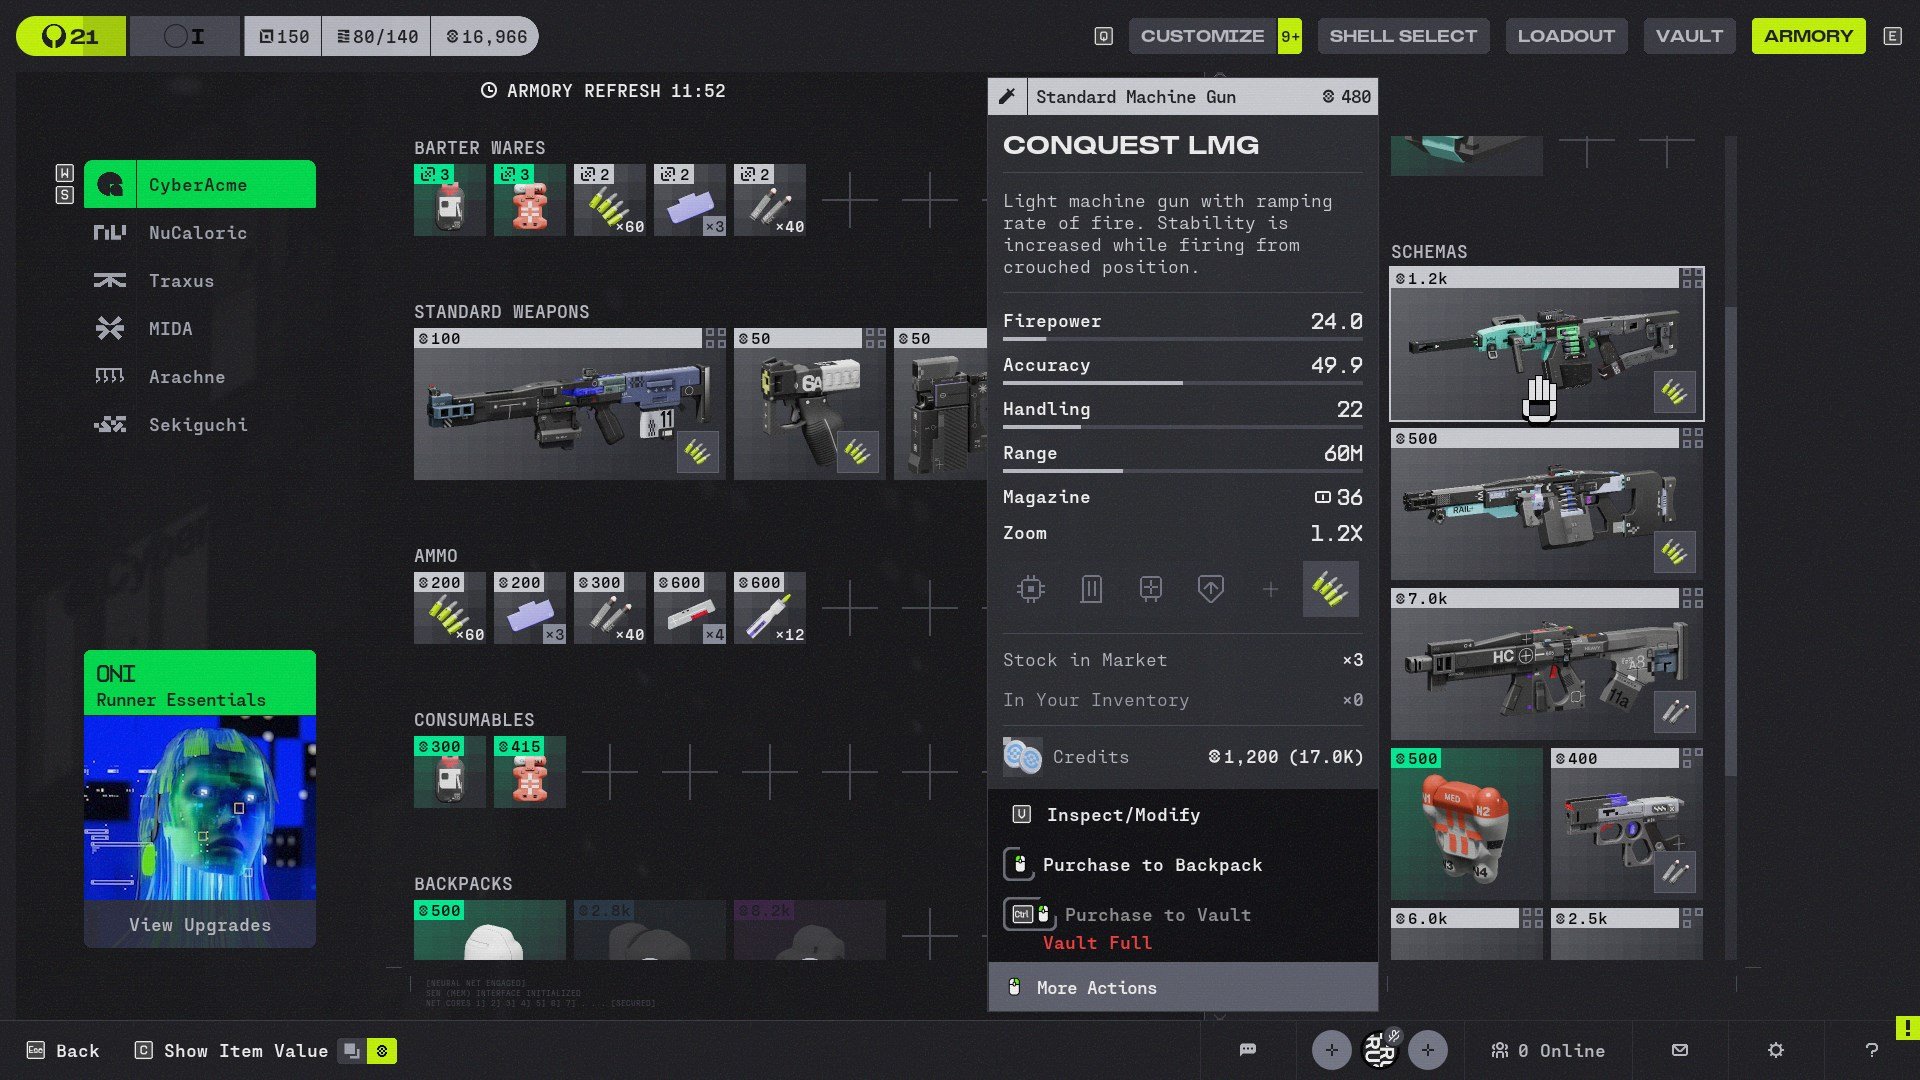
During runs you’ll find items called Schemas.
These act as temporary blueprints. While Marathon doesn’t have traditional crafting, extracting with a Schema allows you to purchase that specific item from the Armory for a limited time.
For example, extracting with a Magnum Schema might allow you to purchase up to three Magnum pistols even if you haven’t unlocked them through faction progression yet.
Some Schemas are expensive, but they provide early access to powerful gear, making it a good source if you have extra cash to spend.
Some Weapons Have Alternate Actions
Another feature that can be easily overlooked is alternative actions in certain weapons. Certain weapons include alternate fire modes or abilities.
For example, the V44 pistol has a charge shot, while some LMGs can equip a shield mod that activates a front shield when aiming down sights. There’s even a rifle with a built-in zoom scope.
Don’t miss out when using weapons like this, as they all have their uses for certain situations.
Don’t Neglect Your Knife
Every player starts with a knife, and it’s far more useful than it first appears.
When holding your knife, you move and sprint faster since firearms add weight. Many players are learning that it’s efficient to switch to their knife when rotating across the map or escaping danger.
The knife is also excellent for silent kills. Basic UESC enemies can be killed with two swings, and Tick Nests or turrets can also be destroyed quietly.
It’s surprisingly effective against players as well. I’ve personally died to Assassin players who used smoke and finished fights with knife attacks. This has been updated to be less effective, but still, don’t feel too confident with a player holding a knife so close to you.
In close-range fights, if you run out of ammo, switching to the knife can sometimes be the fastest way to finish the job.
Dying in Your First Hours in Marathon is Fine
Marathon can feel punishing during your first few hours, especially if you’re still learning how extraction shooters work. Losing gear, running out of money, and getting ambushed by other players is all part of the experience, and quite honestly why I gravitate towards shooter games like it.
But once you start understanding systems like faction upgrades, materials, weapon mods, and heat management, surviving runs on Tau Ceti IV becomes much more manageable.
Stick with it, learn the maps, and use every run as a learning experience. Even failed extractions can teach you something that will help in your next deployment.
About the Author - Carlos Hernandez
Carlos Hernandez is the founder and Editor-in-Chief of Too Much Gaming, where he writes about video games, reviews, and industry news. A lifelong gamer, he would do anything to experience Final Fantasy Tactics for the first time again and has a love/hate relationship with games that require hunting for new gear to improve your character.
Assassin's Creed Black Flag Resynced is a faithful, gorgeous remake that nails everything above water, even if its stale combat proves the series still hasn't solved its oldest problem.