
16 tips to know before starting Final Fantasy XVI
Square Enix and Creative Business Unit III’s Final Fantasy XVI is now out in the wild and I scored it a perfect 10 for a variety of reasons. But in case you’re sold for the same and are about to embark on your first playthrough of the game, here are 16 tips you should know before starting Final Fantasy XVI.
Final Fantasy XVI tips before playing
Don’t ignore the side quests with a plus symbol
The side quests in Final Fantasy XVI can be a hit or miss, but if there’s one thing you must do, it’s the side quests with a plus sign. The exclamation point is the usual side quests while the plus sign is side quests that give you permanent upgrades.
These are the types of quests that can give you upgrades such as increasing your potion’s healing potency or unlocking the ability to call your Chocobo mount. So the next time you are back in the Hideaway after progressing the story, take a glance to see if there are any side quests with a plus sign.

Don’t forget the Active Time Lore
The Active Time Lore is your best friend during the game I’ve been saved countless times from this feature as I had so many questions popping into my head as the scene played out.
If ever you find yourself questioning anything, just press the touchpad for a quick description as the Active Time Lore updates when a term is mentioned or a new character enters the scene.
Don’t underestimate the Garuda pull
Once you receive the ability to use Garuda abilities, the unique ability exclusive to the Eikon is Deadly Embrace, an ability that allows the player to pull small enemies toward you.
It’s a great tool to prevent smaller enemies from fleeing, but the real strength of this ability is when you use Deadly Embrace on a heavy enemy that was just partially staggered (breaking over 50% of the stagger meter) as you deal a Deadly Takedown that partially stuns them even longer, giving you more time to pummel them without reacting, hopefully giving you enough time to completely stagger the enemy.
Always focus on staggering enemies quickly
Real damage towards enemies is your ability to put enemies in a staggered state as quickly as possible, especially heavy enemies and bosses. Pay attention to the Eikon abilities’ star ratings in the Abilities tab as some specialize in dealing pure damage while others deal a great deal of damage to an enemy’s stagger meter.
Have a good mix of abilities meant to break stagger and abilities that would be perfect to deal crazy damage when you have an enemy staggered.
Build your stagger combo multiplier
When you stagger an enemy, don’t think abilities with good stagger damage will be a waste on an already staggered enemy as stagger damage done in this state contributes to increasing your stagger combo multiplier. the higher the multiplier, the higher your abilities will deal damage during the stagger state.
If you have an ability like Garuda’s Gouge active (which does a good amount of stagger damage) don’t hesitate to use it on a Staggered enemy, the blows will make any attacks after it hit much harder. The Stagger Multiplier can go as high as 1.50, so when you get to that point do as much damage as possible.
Get used to magic bursts
Clive has a basic attack combo of 4 hits with his sword. It’s the simplest form of attack either on the ground or in the air, but you can dish out more damage if you add in some magic burst in between each attack.
The game teaches you how Magic Bursts work (press triangle after each attack) but don’t underestimate how much damage it provides as the damage stacks up well in the long run. If you’ve mastered it to a point that it comes naturally to you when doing the normal attack string, you’ll find yourself doing double the amount of hits, getting you closer to your next stagger on your enemy. A full 4-hit combo with all magic bursts is your best form of attack if you have all your abilities on cooldown, so start practicing.
Sell your valuables
When you clear a boss or an encounter, you are given spoils that can either be Gil, crafting materials, or valuables like a Golbin Coin.
It’s easy to distinguish with is meant for crafting or meant for selling. Go to your items in the game’s menu and go to the Materials tab. When hovering on one item you’ll notice text colored in yellow. These will tell you the role the item plays in the game.
If the yellow text says “Valuable. Can be traded for Gil.”, it’s safe to sell it to any shop vendor.
You can reset skills to get back ability points
When spending ability points for a skill, don’t think you are committing to that particular skill. If you need ability points for new skills but are short, consider resetting skills you no longer will be using.
When hovering over a skill you want to refund points from, you’ll see the option to reset the skills. Doing this refunds all the ability points spent on that skill, allowing you to allocate it to another skill.
Craft/buy first, reinforce last
Don’t be like me — regret spending materials reinforcing older weapons and then realizing there’s a new craftable or purchasable item that was just unlocked is still stronger than the item I just reinforced.
When you visit the blacksmith again to upgrade your equipment, be sure to visit the shop vendor to see if there’s a new weapon, compare the damage of the new item then compare it with any new items that can be crafted in the blacksmith. Choose the one with the higher values then go to the blacksmith’s reinforce tab as there’s a likely chance that you can reinforce the item you just crafted or bought.

Limit breaks provide a damage buff
Towards the later part of the game, players will get the ability to trigger Clive’s Limit Break, a fiery state that gives the player a more damaging attack combo that slowly heals the player. Some will also forget that the limit break also gives a 10% damage increase to any eikonic ability you cast and a 10% defense increase.
You can also cancel your Limit Break
Another tip for Limit Breaks is the ability to cancel prematurely. The ability starts with two bars but you can improve Clive’s Limit Break to last for four whole bars with enough Ability Points spent on it. Sometimes, you’ll find yourself in situations where you are waiting for your Limit Break. If that happens you can press the L3 + R3 again to cancel it, saving any remaining bars.
Torgal can bring flying enemies down too
Once you have your soon-to-be best friend wolf companion Torgal in your party you’ll notice that you can issue two attack commands, Sic and Ravage. Sic is a quick damage from Torgal that can search as combo extenders even while in the air while Ravage can launch enemies into the air.
One thing people might forget is that Ravage can also bring flying enemies down. Instead of equipping tools just for the sake of taking enemies down flying enemies remember that you have an answer built-in with Torgal.
Use Torgal’s heal ability before using potions
In the heat of battle, when you are low on health it’s only natural to chug a potion right away and focus on the battle. But if you wanna be efficient and safe with your items (because they are limited), check if you can restore some health with Torgal’s healing ability before using a position. You’ll notice some part of your health bar when damage is grayed out. That amount of health can be slowly restored by Torgal, so assess if you can spare a few seconds to recover that amount of health before using any potions.
Boss fights have checkpoints
If you think that a fight isn’t going your way and you will likely die, keep going. Every major boss battle is long but has internal checkpoints, so don’t worry about starting from the very beginning of the encounter.
It varies from one encounter to another. Some start halfway, and some are after a specific sequence involving a QTE.
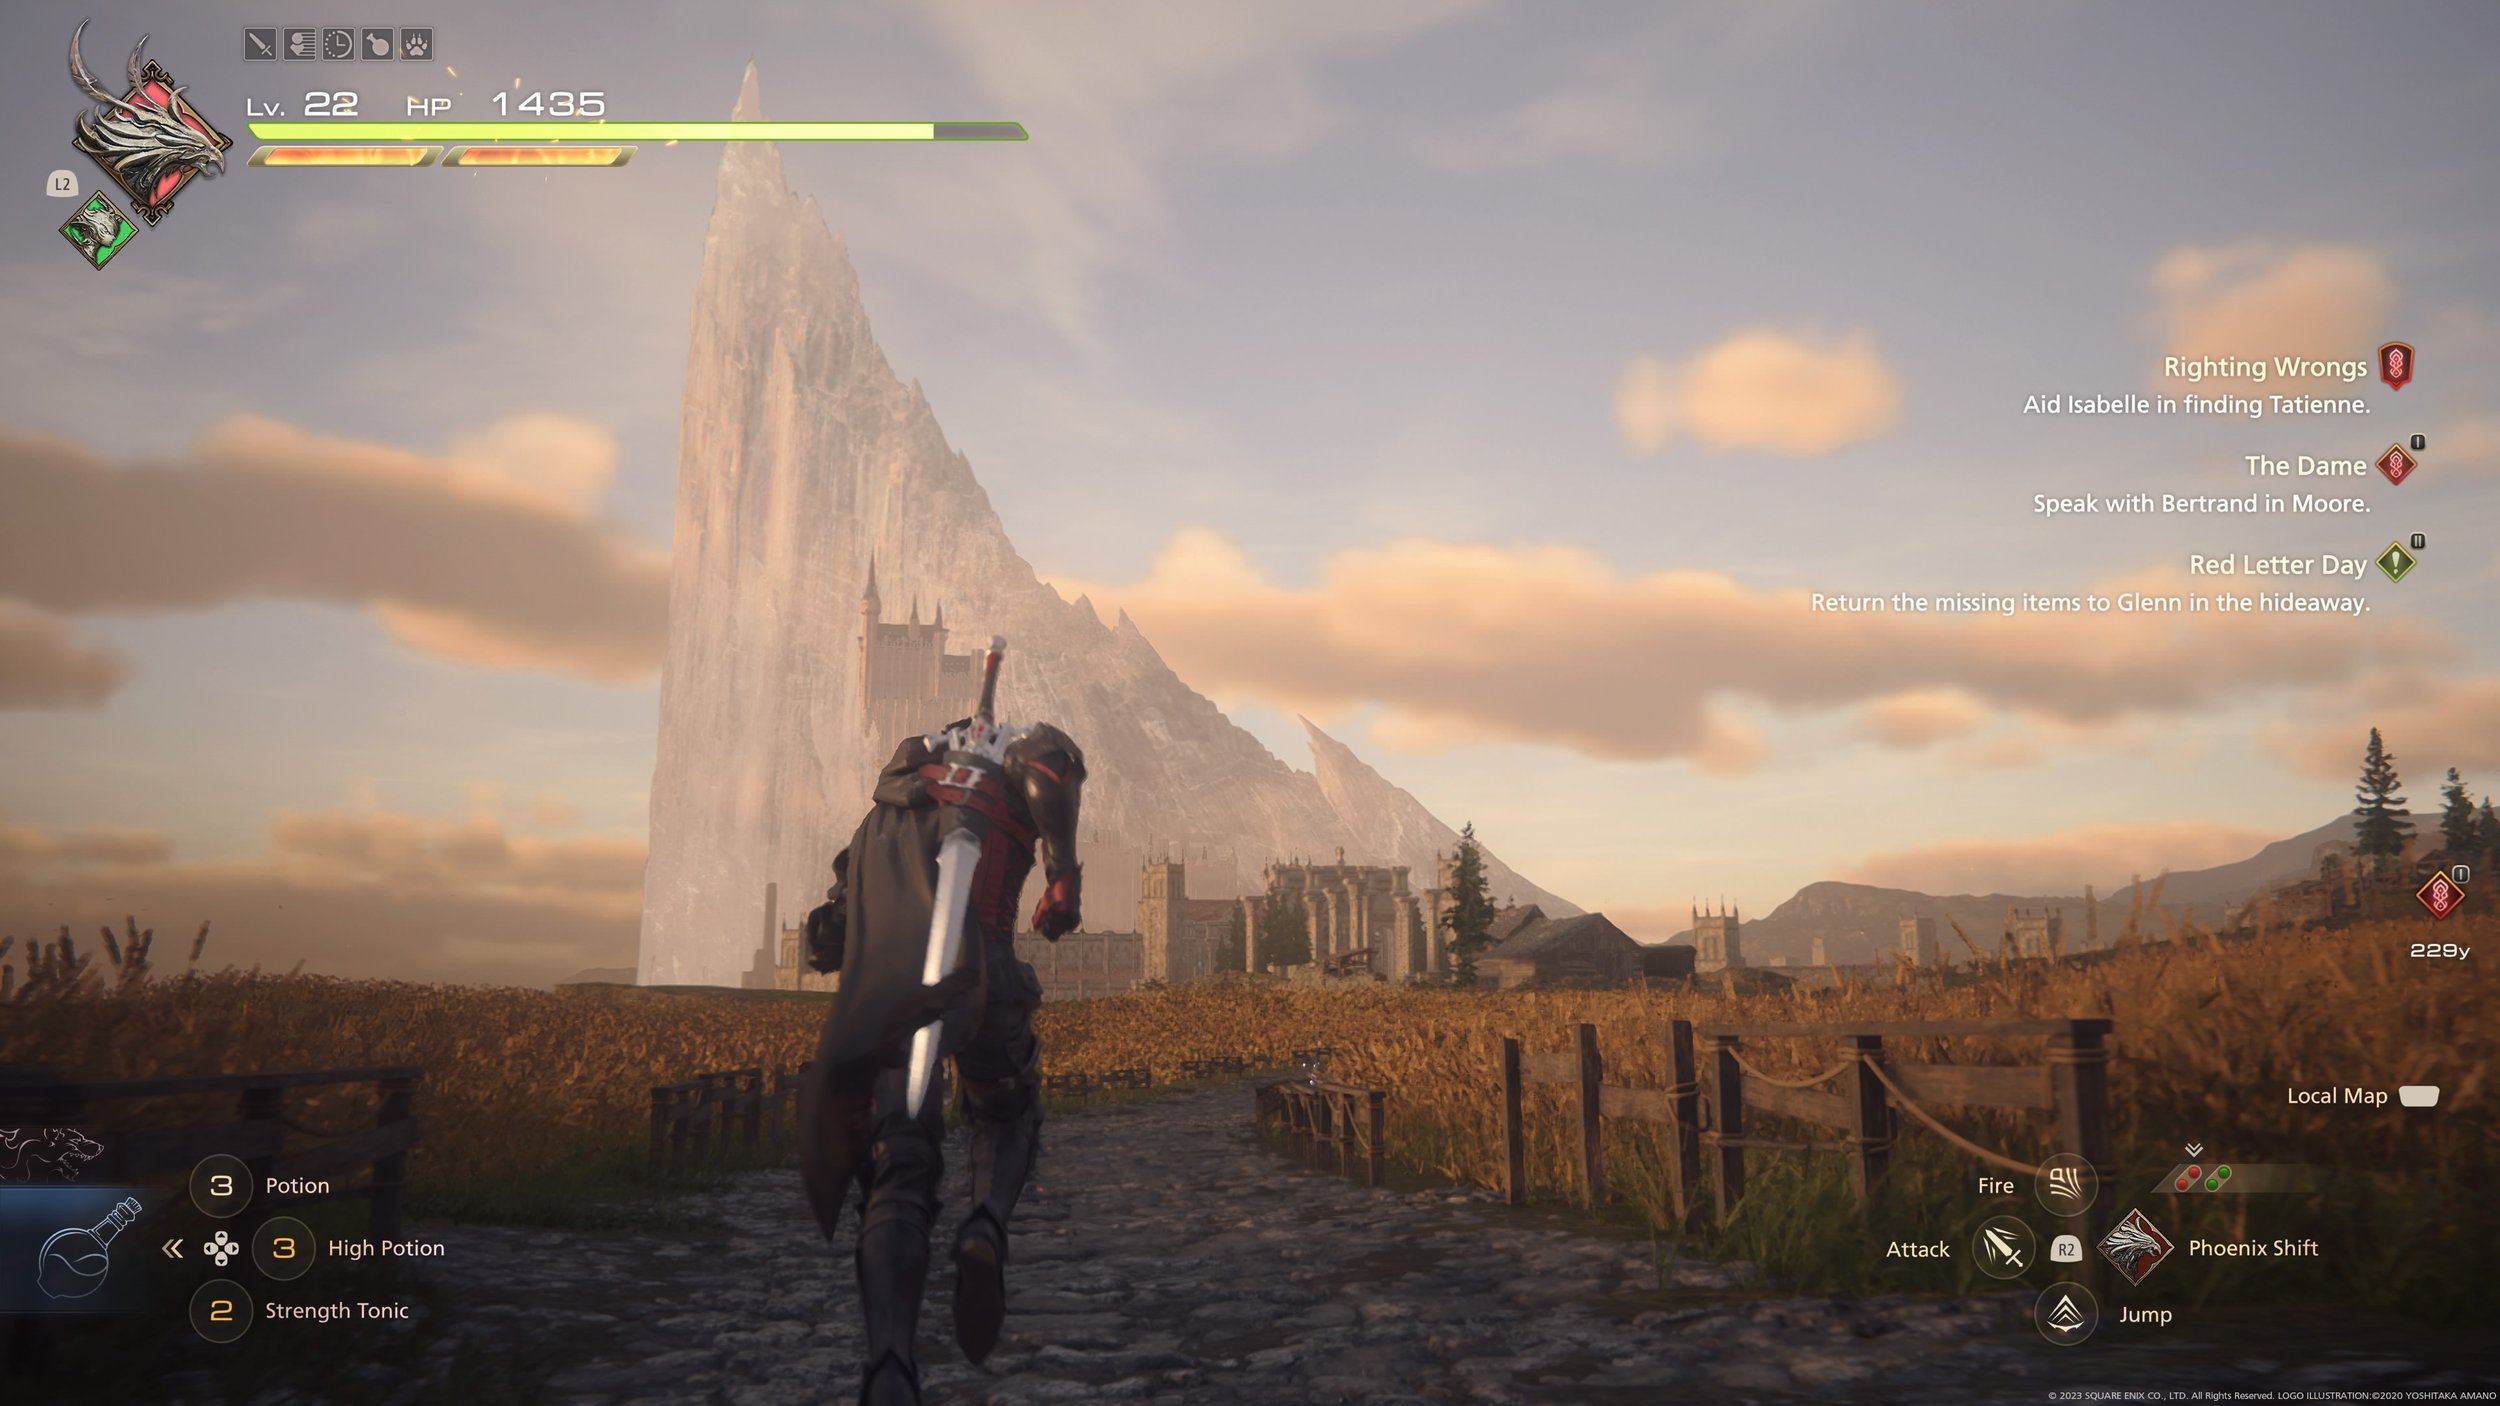
Phoenix shift is to close the gap, not dodge
For beginners, the Phoenix Shift ability will be your go-to ability to close charge forward. But don’t be fooled by how the ability looks as if you are shifting in and out of existence. Regardless of how it looks, if an enemy attacks you while doing Phoenix Shift, you will get hit no matter what as it doesn’t give you invulnerability frames like dodge as all it does is make you move faster quickly.
You can dodge to charge forward
Dodging in this game is one of your strongest defensive tools as it not only allows you to avoid damage but it also gives you the opportunity to deal a strong hit with each successful attempt. But don’t sleep on the fact that you can control the direction of your dodge.
When you perform a successful dodge, direct it using the left joystick. You can position yourself where you will land after a dodge to put you in a better position either to avoid any other threats or dodge forward to continue the assault.

Assassin's Creed Black Flag Resynced is a faithful, gorgeous remake that nails everything above water, even if its stale combat proves the series still hasn't solved its oldest problem.