
Destiny 2 Season of the Seraph Guide - All Resonance Amp Node Locations
The 19th season of Destiny 2 is here and it’s called Season of the Seraph. This season brings back the IKELOS weapons as these new versions have an updated perk pool that can spawn with the latest pools added to the game. To get these weapons you have to unlock Resonance Amp nodes, so here’s a guide detailing the locations of each one.
To earn the new IKELOS weapons, you’ll need to Resonate Stems, which you can earn by simply completing any of the playlist activities in the game. Any playlist will give you two Resonate Stems while opening the second node at the end of a Heist Battleground playlist with Seraph Key Codes (you need 500), you’ll earn three.

Destiny 2 - How to use the Resonance Amp
Once you have four Resonate Stems, head to your Guardian’s Inventory tab and look for Resonance Amp consumable among all your items. With four Resonante Stems available, you can press F to use four to create an Override Frequency. This will give you a clue on where to find a Warmind node which contains one of the new IKELOS weapons.
The clue is rather easy to decipher as each clue starts with “CB.SRVY/RUN”. The words after the number is your clue as the first word is the planet it’s in, the second word is the area, and the last two words are clues to where exactly you can find the these nodes that contain the latest IKELOS weapons.
Take note: When you’re near one of these nodes, you’ll start to hear music and at times, your vision will start to go bright as you get closer to the node. There are twelve in total so far, with the first six located in Europa, while the last six located in the Moon.
To make it easier, we’ve detailed the location of each Warmind node available this season so far.
UPDATE (12/16/2022): It is currently confirmed that the Resonance Amp Node do not reset after the weekly reset as in Week 2 the we previously claimed are still not available. If you’ve already earned all 12 nodes, you won’t be able to convert four Resonant Stems anymore. So, at the moment, you can only obtain the node once in each location. We will update this page if it changes in future weeks.
UPDATE (12/22/2022): Week 3 adds four more Resonance Amp Nodes that can be found in the new Operation: Seraph’s Shield mission. The guide is now updated with the locations of these new nodes.
All Resonance Amp node locations

CB.SRVY/RUN.(01).Europa.Beyond.Cliff.Landing
For this one, you’ll need to go to Europa and drop at the Beyond, which is Exo Stranger’s camp. Once you hit the ground go right and keep following the path. You’ll eventually see a ledge which you need to jump over. Keep following the path and you’ll find the node just waiting by the end of the path.

CB.SRVY/RUN.(02).Europa.Crossing.Outpost.Wall
This Resonance Amp will require you to go to Charon’s Crossing in Europa. Drop at Veriks’ Outpost and start looking at the right side of the outpost, you’ll notice a broken catwalk. Carefully drop down to pick up the node. There you need to go is actually visible the moment you reach the landing zone.
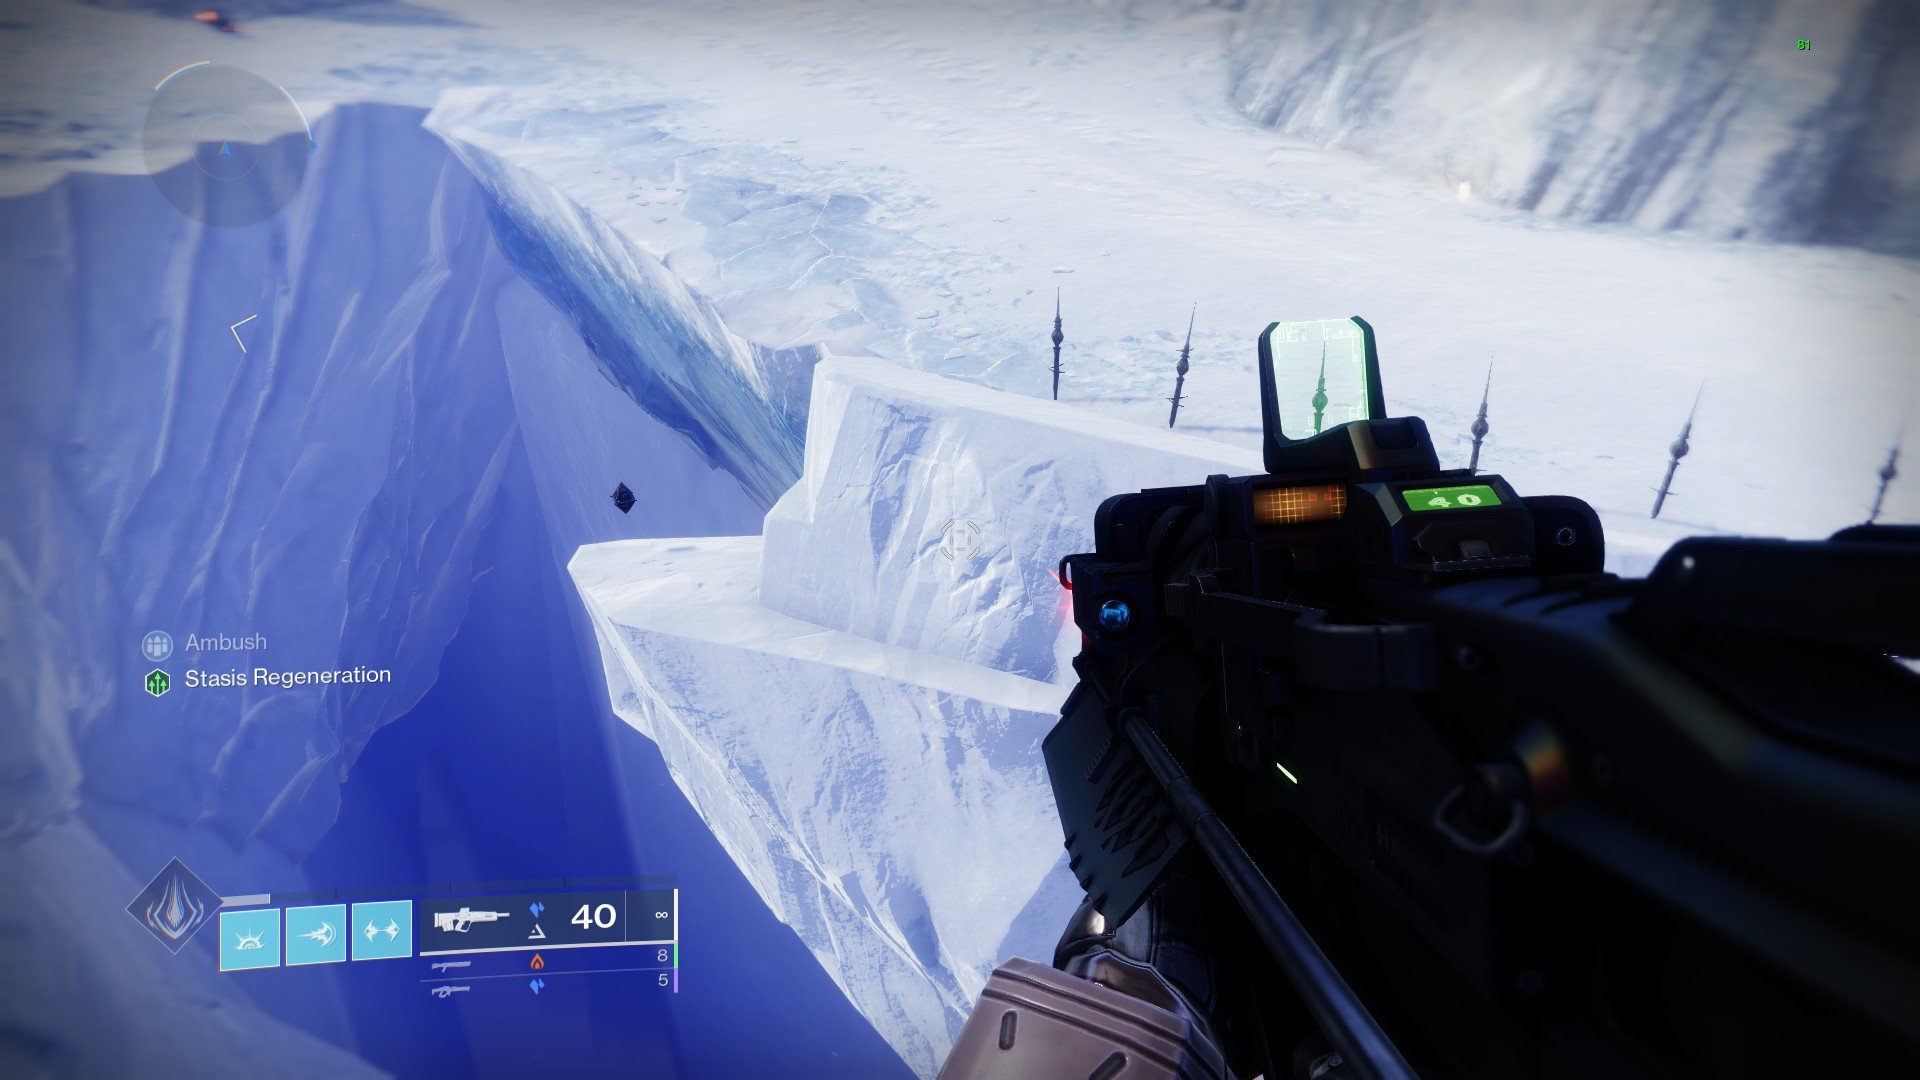
CB.SRVY/RUN.(03).Europa.Ridge.Road.Ledge
For this Warmind node you need to drop in the Charon’s Crossing landing zone. Once you land, start heading left to reach Cadmus Ridge. Keep following the road until you find a set of spikes on the left side of the road.You’ll see a ledge on the final set of spikes and find the node you’re looking for.

CB.SRVY/RUN.(04).Europa.Abyss.Fissure.Construct
This one is also in Europa but this time you’ll need to head to Asterion Abyss. You can start heading there from Charon’s Crossing by heading right. Once you get there head for the large Vex structure. You’ll find the node on the left side of the structure, near the entrance to the Concealed Void Lost Sector.

CB.SRVY/RUN.(05).Europa.Eventide.Cliff.Refuge
This node is in Eventide Ruins. Drop on that landing zone and start going to Mithrax’’s Old hideout. Go straight until you can find a cave entrance marked with green lights. drop down, and once you go past all the hanging Fallen gear you’ll eventually spot the Warmind node on your right.

CB.SRVY/RUN.(06).Europa.Eventide.Dome.Catwalk
This node is also in the Eventide Ruins Landing Zone. Look to your left when you land and you’ll see an entryway to a buried dome. Head inside and you’ll see a circular catwalk above. Head on top and towards the end you’ll find the node.

CB.SRVY/RUN.(07).Luna.Archer.Dome,Catwalk
This Warmind node is on the Moon. Go to the Sanctuary Landing Zone and go left to Archer’s Line. Once you reach the area head right and you’ll see a big rundown dome structure, which is very hard to miss. Go inside and you’ll find the Warmind node.

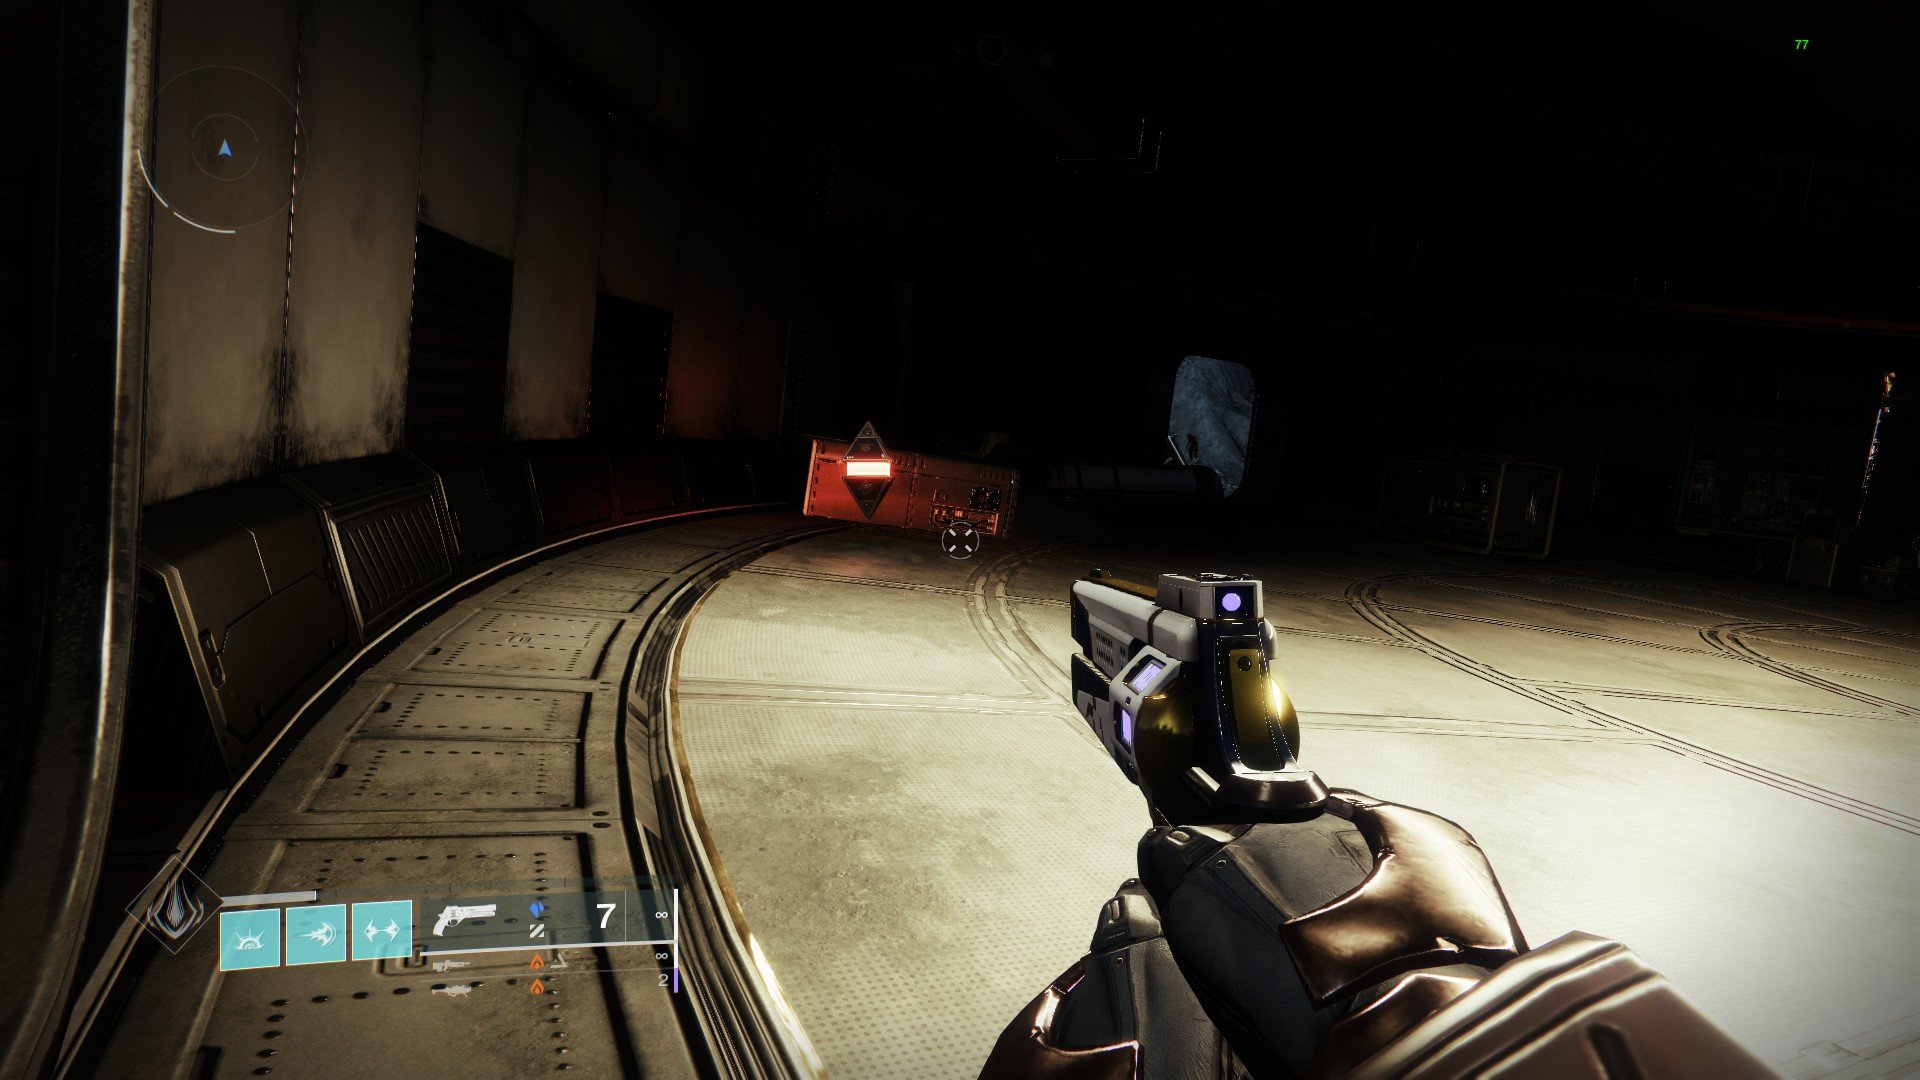
CB.SRVY/RUN.(08).Luna.Archer.Crevasse.Crash
This node will again require you to go to Archer’s Line on the Moon. Again, drop in Sanctuary then make a left to Archer’s Line. Once you reach the area keep hugging the left path until you hit a ramp. Jump across it and once you land, quickly look behind as over the chasm you’ll see a few boxes and what looks like a broken down truck. Head there and you’ll find the Warmind node waiting.

CB.SRVY/RUN.(09).Luna.Hellmouth.Outcropping.Alcove
This one requires you drop at Sorrow’s Harbor. Once you land, backtrack via Sparrow to Hellmouth. Once you reach the area, follow the downward path right to a small cave. You’ll find it at the right side inside the area.

CB.SRVY/RUN.(10).Luna.Anchor.Tower.Rotunda
This node needs you to go to Anchor of Light. Drop at the Sanctuary Landing Zone again but this time take a right to reach Anchor of Light. Once you reach the area the first thing you’ll see is a round structure. Head inside and you’ll find the Warmind node. If Fallen are shooting you, you’re in the right place.
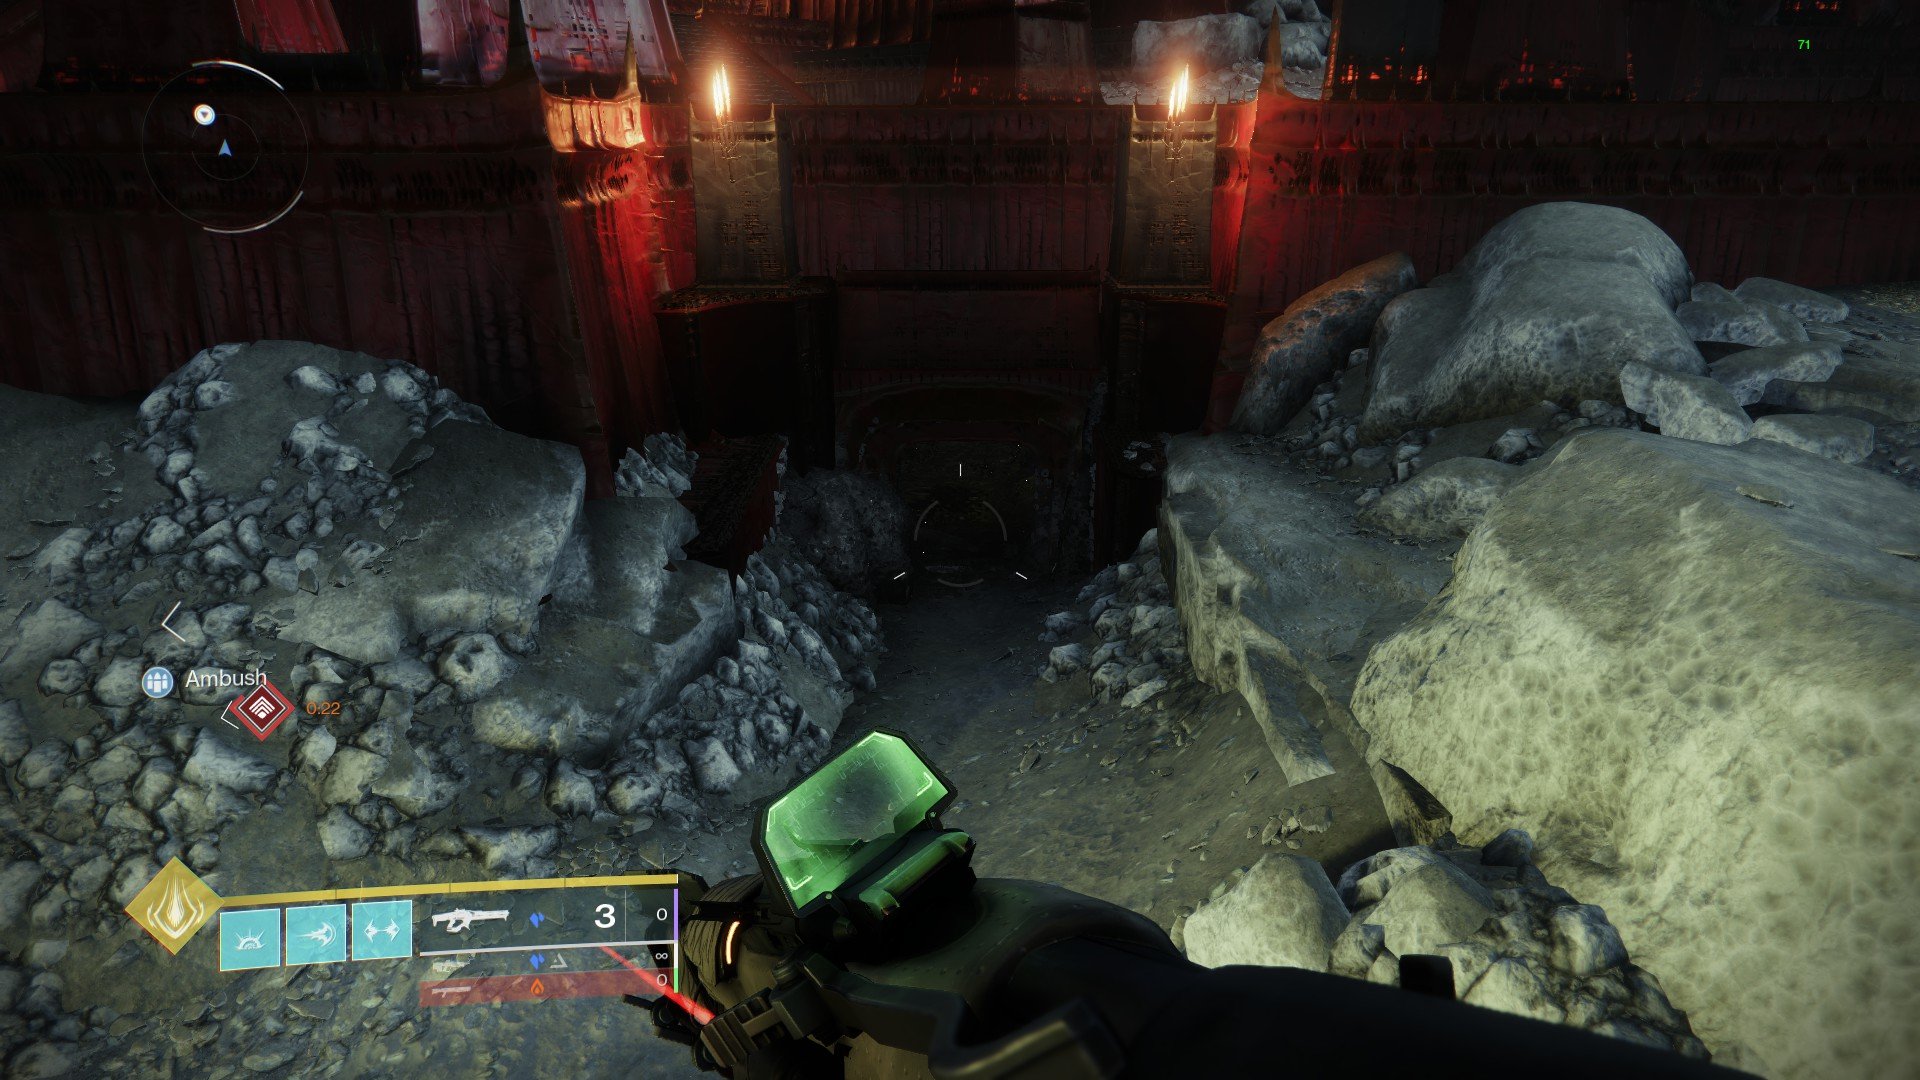
CB.SRVY/RUN(11).Luna.Sorrow.Altar.Recess
This one requires you to drop at Sorrow’s Harbor. Head to the entrance to the Scarlet Keep. Once there, make sure the entrance to the Skarlet Keep is behind you. Move forward until you reach the final area for the Altars public event. Once there, head left down the stairs and you’ll find a cave.
Go inside and all the way in the end you’ll find the node.

CB.SRVY/RUN(12).Luna.Sanctuary.Stage.Backdrop
This one is easy as it’s right on the Sanctuary Landing Zone.Just heard where Eris is and look over the ledge and you’ll spot it.
That’s all the locations so far. This is of course only for Week 1 as we don’t know if Bungie will add more as the season progresses. If they do, we will sure add the new locations in this guide.
Destiny 2’s 19th season, Season of the Seraph will run from December 6, 2022 until February 28, 2023.
Operation: Seraph’s Shield (Nodes 13 - 16)
In Week 3 of Season of the Seraph, Destiny was updated with a new mission called Operation: Seraph’s Shield. This new mission includes four new Resonance Amps to found within the mission. Opening these nodes will give you a guaranteed IKELOS weapon with a Deepsight Resonance.
Once you complete this new mission the first time, you’ll be give the ability to create Override Frequencies with four Resonant Stems for these nodes.
The codes you get are randomized, just like the ones in the Moon and Europa, so there’s a chance that you’ll need to replay the mission a couple of times to get all four. You can get multiple nodes during a single mission run as you can unlock one node, then get a new Override Frequency while on the same mission.

CB.SRVY/RUN.(13).Orbital.Engineering.Shaft.Platform
When you reach the first augment turn-in terminal, you’ll notice a couple of platforms. Work your way up the platform above the door to the next area.

CB.SRVY/RUN.(14).Orbital.Engineering.Servers.Columns
This is hard to miss as it’s in the area where you first encounter the “Operator” augment. When you enter the room head left to server-like room with red lights. The node will be between two pillars.

CB.SRVY/RUN.(15).Orbital.Logistics.Foyer.Hall
This node can be found where you encounter the boss Haroktha, Scourge of the Helium Drinkers for the second time. After finally killing him, when facing the entrance to that room, head right and you’ll find the node down the hallway. Be careful, there’s three sets of lasers to go through. Wait for them to turn off before moving forward.

CB.SRVY/RUN.(16).Orbital.Control.Nexus.Upload
This last node can be found at the last room in the mission, after beating the final boss. When you enter the room where you need to upload the virus, you’ll see the node at your left side.
Assassin's Creed Black Flag Resynced is a faithful, gorgeous remake that nails everything above water, even if its stale combat proves the series still hasn't solved its oldest problem.